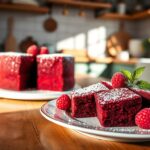
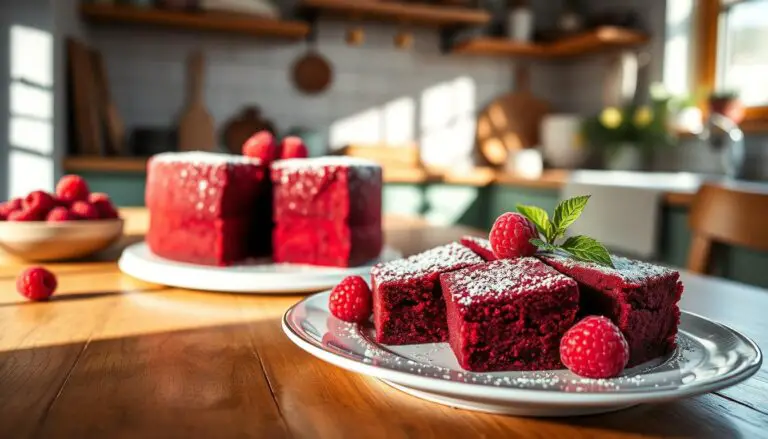
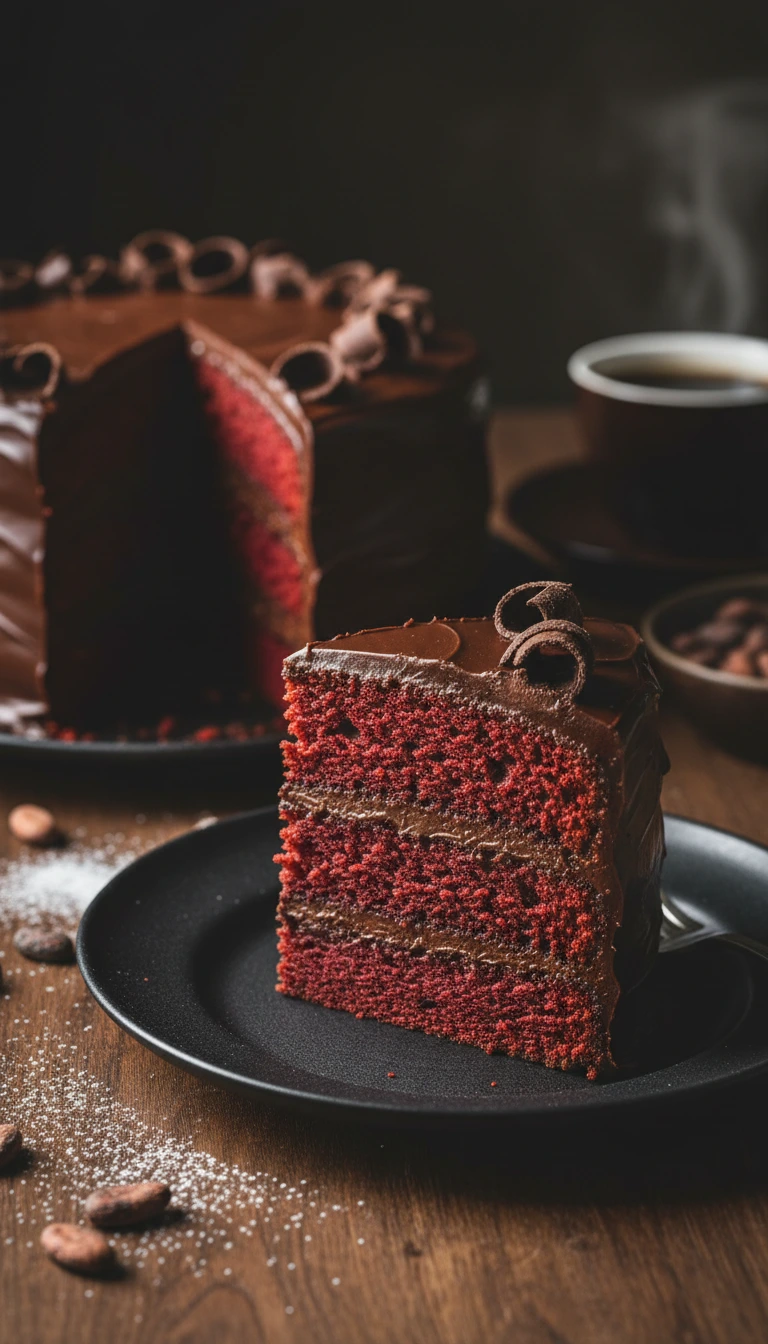
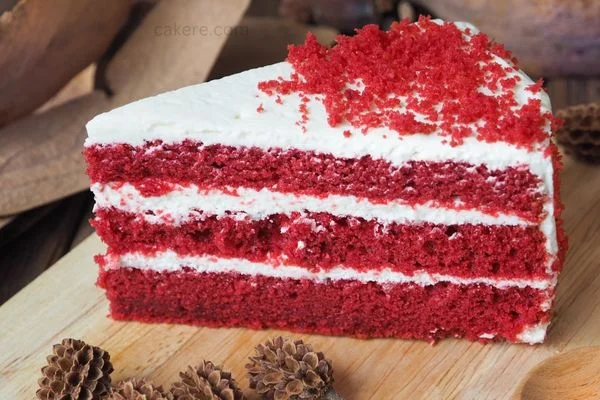
Are you looking for a delicious and classic dessert to impress your guests? Look no further than this recipe for the best homemade red velvet cake. This cake is the perfect combination of moist, velvety texture, and rich cocoa flavor, with a hint of tangy cream cheese frosting. And the best part? You can easily make it from scratch in your own kitchen.
What You Need To Make Real Red Velvet Cake Recipe
- flour
- cocoa powder
- baking soda
- salt
- buttermilk
- vanilla extract
- brown sugar
- unsalted butter
- eggs
How To Make Real Red Velvet Cake
Ingredients
- 1 ½ teaspoons baking soda
- ½ cup cocoa powder
- 1 ½ cups cake flour
- 1 ½ cups all-purpose flour
- cooking spray
- ½ teaspoon kosher salt
- 1 ½ cups buttermilk
- 2 teaspoons vanilla extract
- 3 ¾ cups brown sugar
- 1 ½ sticks unsalted butter, softened
- 3 eggs, at room temperature
Instructions
- To begin baking the cake, preheat the oven to a temperature of 325 degrees F (163 degrees C). In the meantime, prepare the cake pans by lining the bottom of three 9-inch cake pans with parchment paper and spraying the sides with cooking spray.
- Next, prepare the cake batter by sifting together all-purpose flour, cake flour, cocoa powder, baking soda, and salt in a medium-sized bowl. Heat the buttermilk in the microwave until it is warm, which should take about 30 seconds, and then stir in the vanilla extract.
- In a separate bowl, beat the brown sugar and butter together until it becomes light and fluffy, which should take approximately 5 minutes. Add eggs one at a time, ensuring that each addition is mixed thoroughly before proceeding to the next one. Then, blend in the flour mixture and buttermilk in three separate additions until fully combined. Allow the mixer to run on low for 5 minutes, and then distribute the cake batter between the prepared cake pans.
- Place the cake pans in the preheated oven and bake until a toothpick inserted into the center of the cakes comes out clean, which should take 30 to 35 minutes. Once baked, let the cakes cool in the pans for approximately 15 minutes before turning them out and allowing them to cool completely on a wire rack for at least 30 minutes. Cover the cakes with plastic wrap and chill them for at least 1 hour or overnight.
- While the cakes are cooling, prepare the frosting by whisking sugar, milk, flour, and salt together in a medium-sized saucepan. Cook the mixture over medium heat, whisking constantly, until it thickens and begins to simmer, which should take approximately 10 minutes. Pour the mixture into a medium-sized bowl and chill for about 45 minutes, stirring occasionally.
- Afterward, beat the butter until it becomes smooth, which should take about 5 minutes. Slowly add the milk and flour mixture, 1/4 cup at a time, beating between each addition and scraping the sides of the bowl occasionally. Mix in the vanilla extract.
- Level the cake layers before assembling the cake. Spread approximately 2/3 cup of frosting onto the first layer and smooth it into an even layer. Repeat the process with the second and third cake layers. Frost the outsides of the cake with a thin layer of frosting to catch any crumbs and chill for 20 minutes.
- Finally, finish frosting the cake with the remaining frosting and then cut and serve.
Pro Tips for Making Real Red Velvet Cake
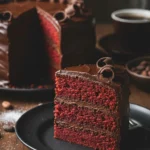
If you’re a baking enthusiast, you must have heard of the infamous Red Velvet Cake. It’s a beautiful and delicious cake that has a deep red color and a velvety texture. However, making the perfect Red Velvet Cake can be a daunting task. In this article, we will share with you pro tips for making real Red Velvet Cake that will leave your taste buds wanting more.
1.Use High-Quality Ingredients
The first step to making a great Red Velvet Cake is to use high-quality ingredients. This includes using high-quality cocoa powder, cake flour, and butter. We recommend using unsalted butter as it gives you better control over the salt content in your cake. Using fresh buttermilk is also crucial as it helps to tenderize the cake and adds a tangy flavor.
2.Measure Your Ingredients Precisely
Measuring your ingredients precisely is crucial to getting the perfect texture and flavor in your Red Velvet Cake. Using a kitchen scale to measure your ingredients is the most accurate way of measuring. Be sure to follow the recipe’s instructions and measure your ingredients precisely.
3.Use Buttermilk and Vinegar
Buttermilk and vinegar are two essential ingredients in making a Red Velvet Cake. The acidity in buttermilk and vinegar reacts with the cocoa powder and helps to intensify the cake’s red color. In addition, the acidity in the buttermilk and vinegar helps to tenderize the cake and give it a tangy flavor.
4.Don’t Overmix Your Batter
Overmixing your batter can result in a dense and tough cake. Mix your batter just enough to combine the ingredients, and avoid overmixing. Overmixing can cause gluten development in the flour, which results in a dense and tough cake.
5.Use Red Food Coloring Sparingly
Red food coloring is what gives the Red Velvet Cake its signature red color. However, it’s essential to use it sparingly as too much can result in a bitter aftertaste. We recommend using gel food coloring instead of liquid food coloring, as it’s more concentrated and gives a more vibrant color.
Conclusion
Our red velvet cake recipe is a guaranteed hit. It’s simple, delicious, and perfect for any occasion. Give it a try, and you won’t be disappointed.
You May Also Like