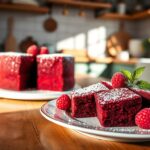
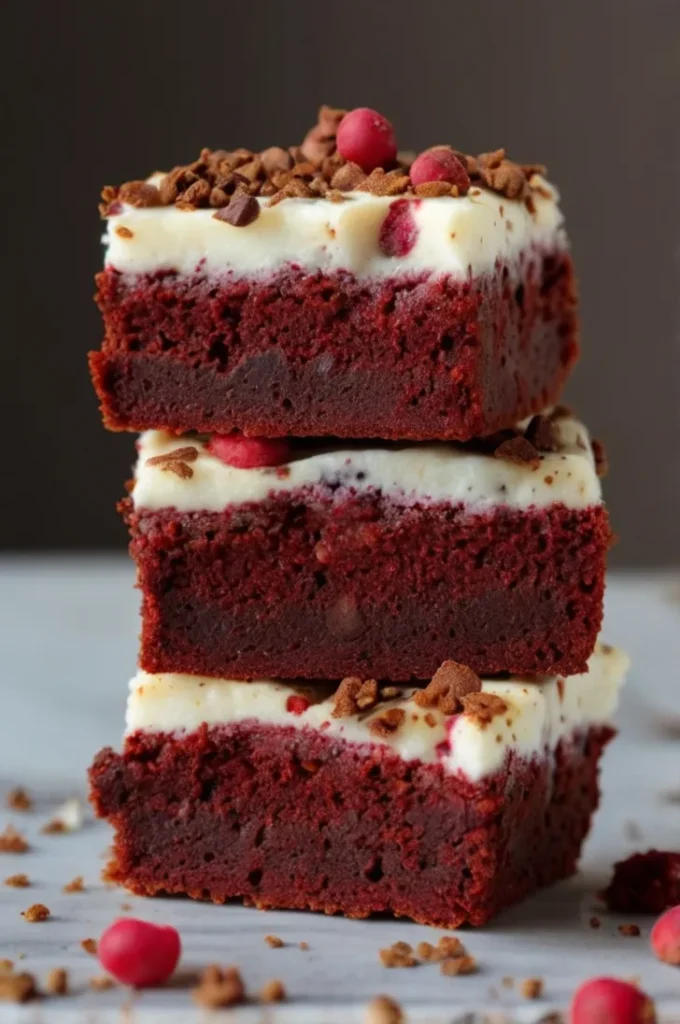
Craving a decadent dessert that combines the richness of brownies with the vibrant allure of red velvet? These Red Velvet Brownies are the ultimate treat for chocolate lovers and red velvet enthusiasts alike.
With their fudgy texture, deep cocoa flavor, and striking red hue, these brownies are perfect for special occasions or whenever you need a luxurious pick-me-up.
Ingredients List
Creating these indulgent Red Velvet Brownies requires a mix of pantry staples and a few special ingredients to achieve that signature red velvet flavor. Let’s break down the ingredients needed for the brownies and the cream cheese frosting.
Brownie Ingredients
- 1 cup (2 sticks) unsalted butter, melted
- 1 ½ cups granulated sugar
- 1 cup light or dark brown sugar, packed
- 4 large eggs, room temperature
- 2 teaspoons pure vanilla extract
- 1 tablespoon red food coloring (liquid or gel)
- ¼ cup unsweetened cocoa powder
- 2 cups all-purpose flour
- ½ teaspoon baking powder
- ½ teaspoon salt
- 1 teaspoon white vinegar (for the classic red velvet tang)
Cream Cheese Frosting Ingredients
- 8 oz cream cheese, softened
- ½ cup unsalted butter, softened
- 3 ½ cups powdered sugar
- 1 teaspoon pure vanilla extract
- Pinch of salt
Optional Garnishes
- Red velvet crumbs (from trimmed brownie edges)
- Sprinkles
- White chocolate shavings
- Edible glitter for a festive touch
Required Kitchen Tools
To ensure a smooth baking experience, gather these essential tools before starting:
- 9×13-inch Baking Pan: For perfectly shaped brownies with the right thickness
- Parchment Paper: To ensure easy removal and clean-up
- Electric Mixer: Stand or hand mixer for the frosting
- Mixing Bowls: Several sizes for wet and dry ingredients
- Measuring Cups and Spoons: For precise measurements
- Rubber Spatula: For folding and spreading
- Whisk: For combining dry ingredients
- Sharp Knife: For clean-cut portions
Brownie Batter Preparation
Creating the perfect Red Velvet Brownie batter requires attention to detail and proper technique. Follow these steps carefully to achieve that signature red velvet texture and taste.
Initial Preparation
Before diving into the mixing process, ensure all ingredients are at room temperature for optimal blending. Having ingredients at the right temperature helps create a smooth, well-incorporated batter that bakes evenly.
Mixing the Base
The key to perfect Red Velvet Brownies lies in the proper combination of wet and dry ingredients. Start by melting the butter until just liquid but not hot. This temperature control ensures your eggs won’t scramble when added and helps create that perfect fudgy texture.
Mix your melted butter with both sugars until well combined. The brown sugar adds moisture and a subtle caramel note, while granulated sugar creates that delicate crispy top. Add eggs one at a time, incorporating each fully before adding the next. This method creates a stable emulsion that helps give your brownies structure.
Creating the Signature Red Velvet Color
After adding vanilla extract, introduce the red food coloring gradually. Different brands may require different amounts to achieve that classic deep red color. Remember that the batter will darken slightly during baking, so aim for a vibrant red rather than a deep burgundy at this stage.
Incorporating Dry Ingredients
The cocoa powder, flour, baking powder, and salt should be sifted together to remove any lumps. This step is crucial for achieving a smooth, professional-quality brownie. When combining wet and dry ingredients, use a folding motion rather than aggressive stirring. This gentle technique prevents over-mixing, which can lead to tough, dense brownies.
The final touch of vinegar might seem unusual, but it’s essential for that subtle tang that makes red velvet treats so distinctive. It also reacts with the baking powder to create a tender crumb structure.
Baking Process and Technique
Creating perfect Red Velvet Brownies requires precise timing and temperature control. Let’s break down each crucial step of the baking process to ensure consistently delicious results.
Getting the Perfect Bake
Begin by preheating your oven to 350°F (175°C). Position your rack in the center of the oven for even heat distribution. Pour the batter into your prepared 9×13-inch pan, using your spatula to spread it evenly into the corners. Give the pan a gentle tap on the counter to release any trapped air bubbles.
Bake for 30-35 minutes, but start checking at the 25-minute mark. The key to fudgy brownies is avoiding overbaking. Your brownies are done when:
- A toothpick inserted comes out with a few moist crumbs
- The edges are slightly pulled away from the pan
- The surface is set but still slightly soft to touch
- The center doesn’t jiggle when gently shaken
Cooling Process
Allow the brownies to cool completely in the pan on a wire rack. Proper cooling is crucial for:
- Developing the right texture
- Making clean cuts
- Preventing the cream cheese frosting from melting
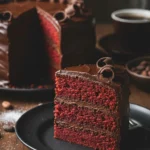
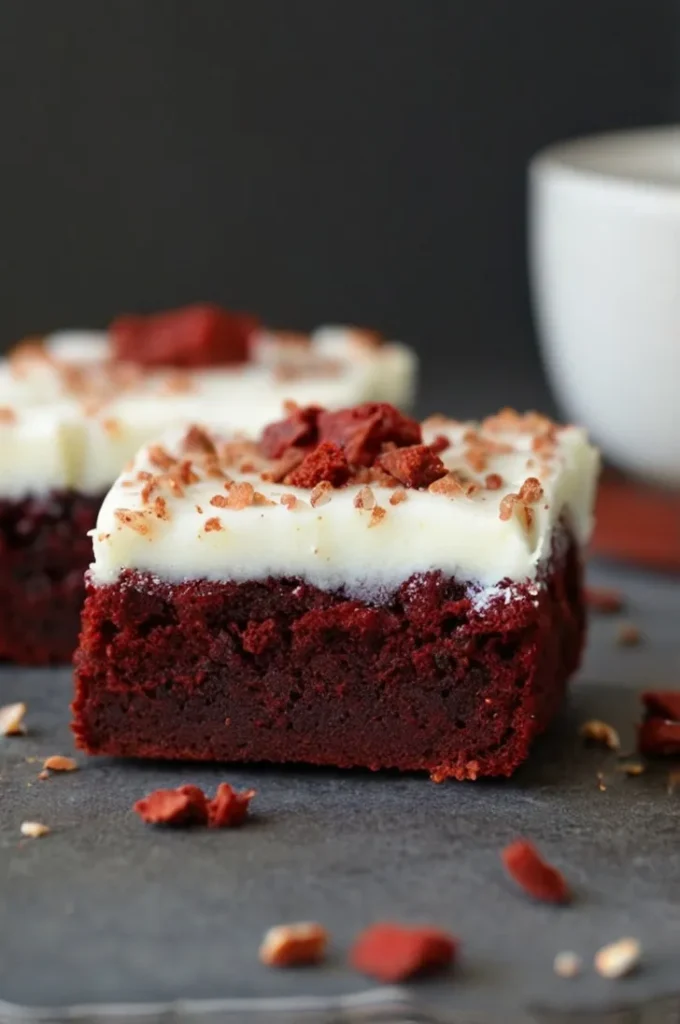
Cream Cheese Frosting
The crowning glory of Red Velvet Brownies is their luxurious cream cheese frosting. This step requires attention to detail and proper technique.
Making Perfect Cream Cheese Frosting
Start with room temperature ingredients – this is non-negotiable for smooth, lump-free frosting. Beat the softened cream cheese first until completely smooth, then add the butter and continue beating until perfectly combined.
Add the powdered sugar gradually, mixing on low speed initially to prevent a sugar cloud. Increase speed to medium-high and beat until light and fluffy. The vanilla and salt balance the sweetness and add depth to the flavor.
Decorating and Serving
Transform your Red Velvet Brownies from delicious to spectacular with these professional finishing touches and serving suggestions.
Frosting Application
Wait until the brownies are completely cool before applying the cream cheese frosting. Use an offset spatula to create:
- A smooth, level surface
- Decorative swirls if desired
- Even coverage from edge to edge
For extra visual appeal, consider creating texture in the frosting using:
- Wave patterns
- Cross-hatch designs
- Rustic peaks and valleys
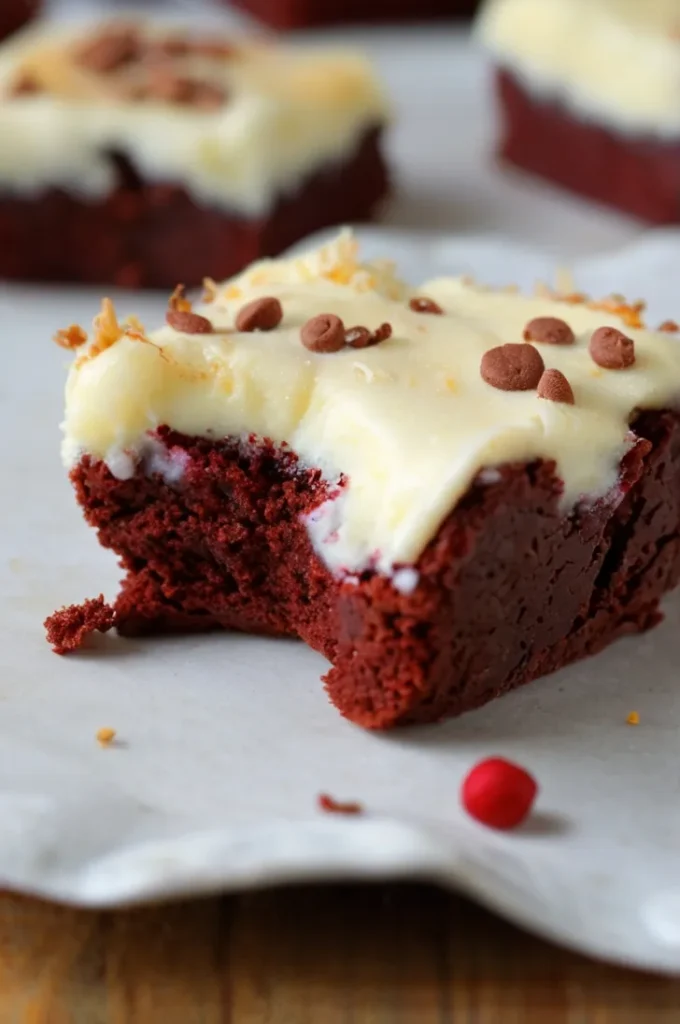
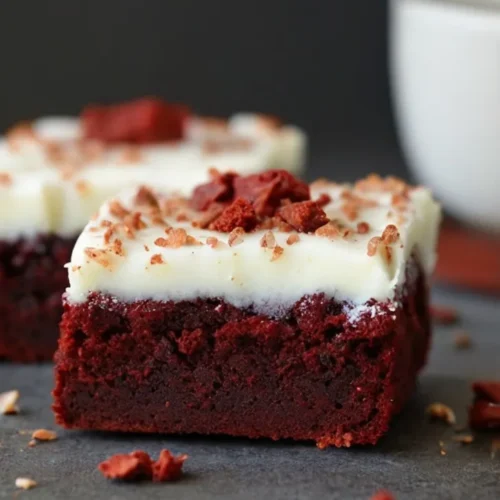
Final Touches and Garnishes
Elevate your brownies with carefully chosen toppings:
- Sprinkle red velvet cake crumbs along the edges
- Add white chocolate shavings for contrast
- Use edible glitter for special occasions
- Place fresh berries on top for a sophisticated touch
Storage Instructions
Proper storage ensures your Red Velvet Brownies maintain their fresh taste and perfect texture.
Room Temperature Storage
- Keep unfrosted brownies at room temperature for up to 3 days
- Store in an airtight container
- Layer with parchment paper if stacking
Refrigerator Storage
- Frosted brownies must be refrigerated
- Will stay fresh for up to 5 days
- Bring to room temperature before serving
- Cover tightly with plastic wrap or in an airtight container
Freezing Instructions
- Freeze unfrosted brownies for up to 3 months
- Wrap individual portions in plastic wrap
- Place in freezer bags with air removed
- Thaw overnight in the refrigerator
Serving Suggestions
Present your Red Velvet Brownies in style:
- Cut with a hot knife for clean edges
- Serve on decorative plates
- Pair with vanilla ice cream for dessert
- Accompany with coffee or milk
- Consider as a stunning addition to dessert tables or gift boxes
Remember to store any leftover brownies properly to maintain their delicious taste and texture for future enjoyment.
Conclusion
These Red Velvet Brownies are the perfect blend of fudgy brownie goodness and the iconic red velvet flavor. With their rich chocolate base, vibrant red hue, and creamy cream cheese frosting, they’re sure to impress anyone who takes a bite. Whether you’re baking them for a special occasion or just because, this recipe is a guaranteed crowd-pleaser.
So, grab your ingredients, preheat your oven, and get ready to create a dessert that’s as beautiful as it is delicious. Happy baking!
How To Make Red Velvet Brownies
Ingredients
- 2 cups white sugar
- ¼ teaspoon salt
- ¼ teaspoon ground red pepper
- 1 teaspoon baking powder
- 1 cup unsweetened cocoa powder
- 1 cup all-purpose flour
- ½ cup sour cream
- ¼ cup butter, softened
- 2 eggs, lightly beaten
- 1 tablespoon red food coloring
- 1 teaspoon vanilla extract
Instructions
- Preheat oven to 350 degrees F (175 degrees C). Grease and flour a 9×13-inch baking dish.
- Whisk flour, cocoa powder, baking powder, ground red pepper, and salt together in a bowl.
- Beat sugar, sour cream, butter, eggs, red food coloring, and vanilla together in a bowl. Add flour mixture to sour cream mixture and stir to combine. Pour batter into prepared baking dish.
- Bake in the preheated oven until a toothpick inserted into the center comes out with fudgy crumbs, 30 to 35 minutes. Cool in the pan before slicing.
You May Also Like