The Brooklyn Blackout Cake Recipe, known for its rich, dark, and moist chocolate cake with fudgy chocolate frosting, has a fascinating history. It earned its name from the power outages in Brooklyn in the 1940s, making it a decadent dessert.
During World War II, the military shut down power along the waterfront so that battleships could leave the Brooklyn Navy Yard without detection. Blackout drill notifications were posted all over the borough and the name Brooklyn Blackout Cake took hold.
Key Brooklyn Blackout Cake Ingredients & Why
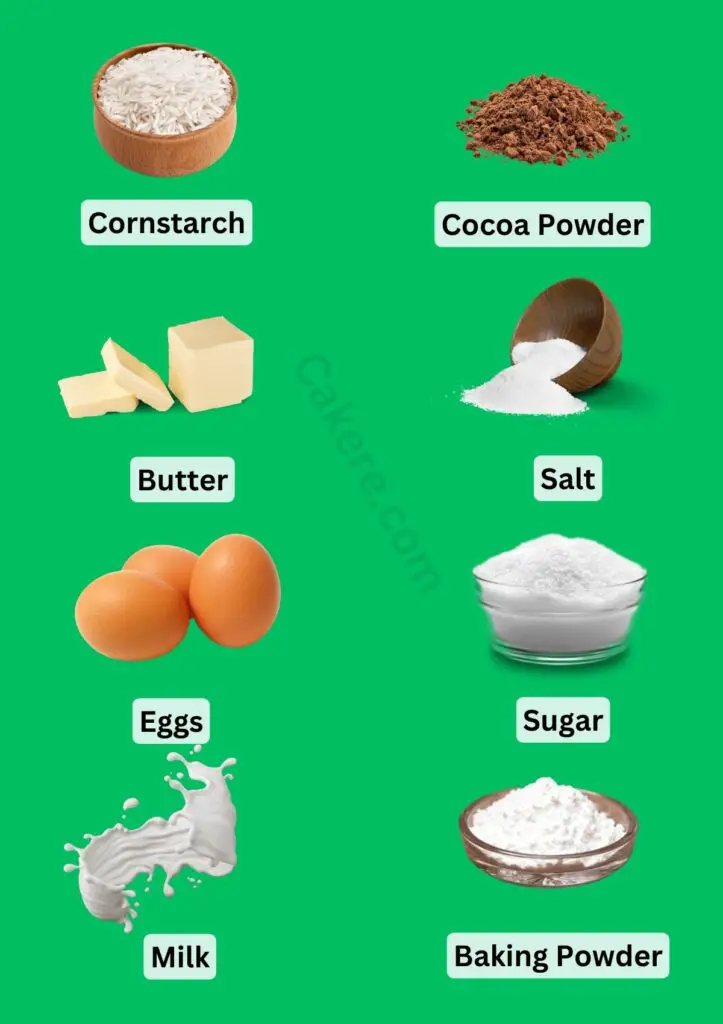
Cocoa Powder
Adds the signature rich chocolate flavor to Brooklyn Blackout Cake.
Chocolate
Various forms of chocolate – chips, unsweetened, semisweet, and dark – deepen and enrich the cake and pudding.
Cornstarch
Thickens and lends a silky texture to the pudding filling.
Sugar
Balances the cocoa powder and chocolate bitterness while adding sweetness to cake, pudding, and frosting.
Butter
Infuses richness and flavor into both cake and frosting.
Milk
Brings creaminess and richness to the pudding and frosting.
Flour
Provides structure and texture to the cake.
Baking Powder and Baking Soda
Leavening agents that make the cake rise, resulting in a light and fluffy texture.
Salt
Enhances flavor and balances sweetness in the cake, pudding, and frosting.
How Do You Make The Best Brooklyn Blackout Cake?
- Begin by making the custard, which requires chilling. In a large pan, combine all the ingredients, leaving out the vanilla. Gently heat and whisk continuously until you achieve a silky, thick custard, which typically takes 5-7 minutes from cold. Add the vanilla and a pinch of salt, then transfer the custard to a wide, shallow bowl. Cover it with cling film, let it cool, and refrigerate for a minimum of 3 hours until it’s cold and firm.
- To begin, preheat your oven to 180C (160C fan/gas 4) and prepare two 20cm sandwich tins by greasing and lining the bases. Next, melt the butter in a pan, and mix it with oil, buttermilk, coffee, and eggs. In a large bowl, whisk together the dry ingredients along with 1/4 tsp salt (no need to sift) and crush any sugar lumps. Add the wet ingredients and whisk until the mixture is smooth.
- Pour the batter into the tins and bake for 25-30 minutes until the cakes are done. Allow them to cool for 10 minutes, then move them to a rack with the parchment side facing down for complete cooling.
- First, remove the parchment linings from the cakes. If the cakes have a domed top, trim them to be level. Now, using a large serrated knife, carefully cut each cake in half horizontally. Take the least successful layer and any cake trimmings, put them in a food processor, and pulse until they turn into crumbs. Transfer the crumbs to a large bowl for later use.
- Start by placing one cake layer on a plate. Spread a quarter of custard on it. Add the next layer, another quarter of custard, and the final cake layer. Finish by generously spooning the remaining custard on top, ensuring a smooth texture. Chill for 15 minutes to set the custard.
- Sprinkle and press crumbs onto the cake over the bowl, chill for 2 hours or longer. Enjoy it cold, and for an enhanced fudgy, enticing experience, make it up to 2 days ahead.
Pro Tips For Making Brooklyn Blackout Cake Recipe
- Precisely follow the recipe, measuring all ingredients.
- Ensure both the pudding and cake cool adequately before assembling.
- Opt for high-quality chocolate for superior flavor.
- Enhance cake moisture by brushing layers with a sugar-water syrup.
- Evenly slice cake layers using a serrated knife.
- Prevent cake movement with a slightly larger cake board or plate.
- Achieve a professional look by using an offset spatula for frosting and pudding.
- Sprinkle cake crumbs evenly for a neat presentation.
- Chill the cake for at least an hour to meld flavors before serving.
How to Store Brooklyn Blackout Cake
- For short-term storage, refrigerate the cake wrapped in plastic for up to 3 days.
- To preserve the cake for an extended period, freeze it by wrapping it in plastic and then aluminum foil. Store it in a freezer-safe container for up to 2 months.
- When thawing a frozen cake, place it in the refrigerator overnight. Afterward, let it sit at room temperature for 1 hour to soften the icing before serving.
- For optimal freshness after cutting, slice the entire cake, wrap each piece in foil, and keep them in a zip-top bag in the fridge.
Can You Freeze Brooklyn Blackout Cake?
You can freeze your Brooklyn Blackout Cake. It’s shipped frozen with dry ice, and you can store it in your freezer for up to 3 months. For individual slices, use a ziplock bag before placing them in an airtight freezer-friendly container. When ready to serve, take it out of the refrigerator a few hours in advance for the best experience.
Frequently Asked Questions About Brooklyn Blackout Cake
What are the key features of Brooklyn Blackout Cake?
Indulge in the decadence of Brooklyn Blackout Cake. It features layers of moist chocolate cake, a luscious chocolate pudding filling, all enrobed in rich chocolate fudge frosting, and generously crowned with chocolate crumbs.
What is the history of Brooklyn Blackout Cake?
In its heyday from 1894 to 1972, Ebinger’s, the beloved Brooklyn bakery, introduced the original Blackout Cake, a treat that outshone all its other specialties like Crumb Buns and Lemon Cupcakes. Sadly, this cherished institution is now a thing of the past.
Is Brooklyn Blackout Cake gluten-free?
You can find gluten-free versions of Brooklyn Blackout Cake.
Brooklyn Blackout Cake Recipe
Ingredients
For the cake
- 140g unsalted butter, plus extra for greasing
- 100ml vegetable oil
- 100ml coffee, made with 1 tsp espresso powder
- 2 large eggs, at room temperature
- 1 tsp vanilla extract
- 250g light muscovado sugar
- 250g plain flour
- 1 tsp bicarbonate of soda
- 2 tsp baking powder
- 50g cocoa powder
For the custard filling and covering
- 250g golden caster sugar
- 500ml full-fat milk
- 140g chocolate, 85% cocoa solids, broken into cubes
- 2 tsp espresso powder
- 2 tsp vanilla extract
Instructions
- Prepare the custard by combining all the ingredients (except the vanilla) in a large pan. Gently heat while whisking until you have a silky, thick custard, which takes about 5-7 minutes from cold. Stir in vanilla and a pinch of salt, then transfer the custard to a wide bowl. Cover with cling film, cool, and refrigerate for a minimum of 3 hours until cold and set.
- Start by preheating the oven to 180C (160C fan/gas 4) and preparing two 20cm sandwich tins by greasing and lining their bases. In a pan, melt the butter, then blend it with oil, buttermilk, coffee, and eggs. In a separate large bowl, whisk the dry ingredients along with 1/4 tsp of salt, skipping the sifting process, and make sure to crush any sugar lumps. Finally, combine the wet and dry ingredients, whisking until you achieve a smooth mixture.
- Evenly distribute the batter into the tins and bake for 25-30 minutes until the cakes rise and a skewer comes out clean when inserted into the center. Afterward, let them cool for 10 minutes before transferring them to a rack with the parchment side down.
- Discard parchment linings from cakes. Flatten domed cakes. Slice each cake in half with a large serrated knife. Process the least successful layer and trimmings into crumbs. Transfer to a large bowl.
- Place one cake layer on a plate, spread with a quarter of the custard, add the next layer, and another quarter of custard. Top with the final cake layer. Spoon the remaining custard on top, spreading it smoothly. Chill for 15 mins to firm up the custard.
- To create a delectable masterpiece, hold the cake over the crumbs, generously sprinkle and press them onto the cake. Brush off any excess onto the plate. Chill for a minimum of 2 hours or, for an even more irresistible delight, prepare it up to 2 days in advance. The cake's texture becomes increasingly fudgy and alluring with time.