Royal icing frosting is a versatile and widely used medium for decorating baked goods. Its smooth, glossy finish and ability to hold intricate designs make it a favorite among both amateur and professional bakers.
Introduction to Royal Icing Frosting
Royal icing frosting is a type of icing that hardens when dry, creating a firm surface that can be decorated and piped onto cakes, cookies, and other baked goods.
Its origins can be traced back to medieval times when it was used to create intricate designs on royal cakes and desserts. Today, royal icing is widely used in the world of baking for its versatility and ability to transform ordinary treats into stunning works of art.
What is Royal Icing?
Royal icing is made primarily from egg whites and powdered sugar. The egg whites provide the structure and stability, while the powdered sugar adds sweetness and helps create a smooth consistency.
Other ingredients such as lemon juice or cream of tartar may be added to improve the icing’s texture and taste.
The Importance of Royal Icing in Baking
Royal icing plays a crucial role in the world of baking. It not only adds an aesthetic appeal to the final product but also provides structural support.
When decorating sugar cookies, gingerbread houses, or wedding cakes, royal icing acts as a glue, holding the pieces together and ensuring they stay in place. Its ability to dry hard also makes it ideal for creating three-dimensional decorations and intricate piping work.
Ingredients Required for Royal Icing Frosting
To make royal icing frosting, you will need the following ingredients:
- Egg whites (or meringue powder)
- Powdered sugar (confectioners’ sugar)
- Lemon juice or cream of tartar (optional)
- Food coloring (gel-based colors work best)
- Flavor extracts (such as vanilla or almond)
Ensure that your egg whites are fresh and free from any traces of yolk, as even a small amount of yolk can prevent the icing from reaching the desired consistency.
to intricate lace-like details, the piping consistency of royal icing is the go-to choice. It offers precise control and can be used to add a touch of elegance to any cake.
Tips and Techniques for Working with Royal Icing
Working with royal icing requires some finesse and practice. Here are a few tips and techniques to help you achieve the best results:
Consistency is Key
Pay close attention to the consistency of your royal icing. It should be smooth and spreadable for flooding, but thick enough to hold its shape when piped. Adjust the consistency as needed by adding more powdered sugar or liquid.
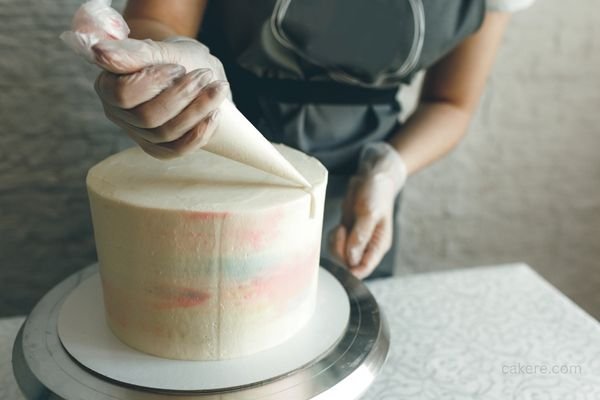
Proper Piping Techniques
When piping designs with royal icing, it’s essential to hold the piping bag at the correct angle and apply consistent pressure. Practice different piping techniques, such as dots, lines, and rosettes, to enhance your decorating skills.
Using Stencils and Templates
Stencils and templates can be helpful tools when working with royal icing. They provide guidelines for creating consistent shapes and designs. Secure the stencil or template firmly on the surface and use a small offset spatula or a piping bag to apply the icing.
Storage and Shelf Life of Royal Icing Frosting
Royal icing can be stored in an airtight container at room temperature for up to two weeks.
If you need to store it for a more extended period, refrigeration is recommended. Before using refrigerated royal icing, allow it to come to room temperature and re-beat it to restore the desired consistency.
Troubleshooting Common Issues with Royal Icing
While working with royal icing, you may encounter a few common issues. Here are some troubleshooting tips to help you overcome them:
Icing Too Runny or Thin
If your royal icing is too runny or thin, add more powdered sugar gradually until you achieve the desired consistency. Alternatively, let the icing sit for a few minutes to thicken naturally.
Icing Too Thick or Stiff
To thin out thick or stiff royal icing, add a small amount of liquid, such as water or lemon juice, and mix well. Add the liquid gradually until the desired consistency is reached.
Icing Not Drying Properly
If your royal icing takes too long to dry or remains tacky, ensure that the area is well-ventilated and not too humid. You can use a fan or a dehumidifier to speed up the drying process. Additionally, avoid overcrowding the decorated items, as airflow is crucial for proper drying.
FAQs
Yes, you can use pasteurized egg whites as a substitute for raw egg whites. Pasteurized egg whites are often available in cartons at grocery stores and provide a safe alternative.
The drying time of royal icing depends on various factors such as humidity, thickness, and airflow. In general, it takes anywhere from 1 to 12 hours for royal icing to dry completely.
To store leftover royal icing, transfer it to an airtight container and keep it at room temperature for up to two weeks. If you need to store it for a longer period, refrigeration is recommended. Before using refrigerated royal icing, allow it to come to room temperature and re-beat it to restore the desired consistency.
Regular liquid food coloring can alter the consistency of royal icing as it adds additional liquid. It is best to use gel-based or powdered food coloring specifically made for icing, as they provide vibrant colors without affecting the icing’s consistency.
Conclusion
Royal icing frosting is a versatile and indispensable tool for adding elegance and artistry to your baked goods.
From beautifully decorated sugar cookies to intricate cake designs, royal icing opens up a world of creative possibilities.
With the right ingredients, proper techniques, and a bit of practice, you can master the art of royal icing and create stunning edible masterpieces.