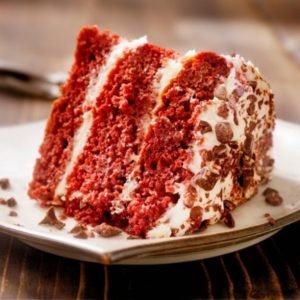
A red, red-brown, crimson, or scarlet-colored chocolate layer cake with ermine icing is what red velvet cake is commonly known as. The crimson hue of traditional recipes comes from non-Dutch, anthocyanin-rich chocolate rather than from food coloring. Buttermilk, butter, chocolate, vinegar, and wheat are typical components.
Red velvet cake Recipe
Bake a delicious red velvet cake to create a contemporary classic. This decadent sponge is ideal for a celebration, or you can cut it in half for a smaller crowd.
Ingredients
- 300 ml vegetable oil, plus extra for the tins
- 500 g plain flour
- 2 tbsp cocoa powder
- 4 tsp baking powder
- 2 tsp bicarbonate of soda
- 560 g light brown soft sugar
- 1 tsp fine salt
- 400 ml buttermilk
- 4 tsp vanilla extract
- 30 ml red food colouring gel or about ¼ tsp food colouring paste, (use a professional food colouring paste if you can, a natural liquid colouring won't work and may turn the sponge green)
- 4 pic large eggs
For the icing
- 250 g slightly salted butter, at room temperature
- 750 g icing sugar
- 350 g tub full-fat soft cheese
- 1 tsp vanilla extract
Instructions
- Oven temperature set to 180°C/160°F fan/gas 4 Two 20cm cake tins should be oiled and lined with baking parchment on the base and sides; if your cake tins are fairly shallow, line the sides to a depth of at least 5cm.
- In a bowl, combine the flour, baking powder, bicarbonate of soda, sugar, and salt in equal portions. Squeeze any sugar lumps with your fingers to break them up if there are any.
- Buttermilk, oil, vanilla extract, food coloring, and 100ml of water are divided in half. Add two eggs, then whisk to combine. Mix the dry ingredients thoroughly before adding the wet ones. The cake batter should be a vibrant crimson color; as it cooks, it will turn a little darker. Add a little more coloring if you'd like it to be more vivid. The cake should be baked for 25 to 30 minutes, or until it has risen and a skewer inserted in the center comes out clean. After 10 minutes of cooling in the tins, flip the baked goods out onto a wire rack, remove the parchment paper, and let them cool.
- With the remaining ingredients, repeat steps 1 and 2 to create a total of four sponge cakes. if wrapped in cling film, it can be prepared up to three days in advance and will stay moist; alternatively, it can be packed tightly and frozen for up to two months.
- Put the butter in a big bowl and sieve in half the icing sugar to make the icing. With a spatula, roughly combine the ingredients; then, using a hand mixer, blend until smooth. Add the soft cheese and vanilla, mix again, then use a hand mixer to blend once more after sieving in the remaining icing sugar.
- To assemble the cake, use some of the soft cheese frosting to attach one of the sponges to a cake stand or board. Spread a large amount of frosting between each layer as you stack the remaining cakes on top using about half the leftover icing. Place the remaining frosting on top of the completed cake and spread it evenly across the top and sides with a palette knife. Use some kitchen paper to clean off the plate. Store any leftovers for up to two days in the refrigerator, but bring them back to room temperature for about an hour before eating.
Notes
Nutrition Information:
- fat 31g
- saturates 11g
- carbs 86g
- sugars 66g
- fibre 1g
- protein 6g
- salt 1.5g
Final Thought:
Bake a delicious red velvet cake to create a contemporary classic. This decadent sponge is ideal for a celebration, or you can cut it in half for a smaller crowd.