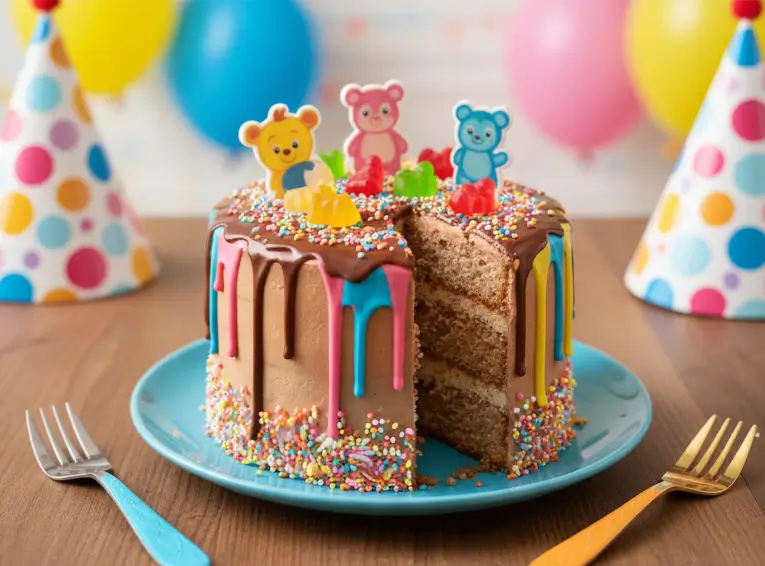
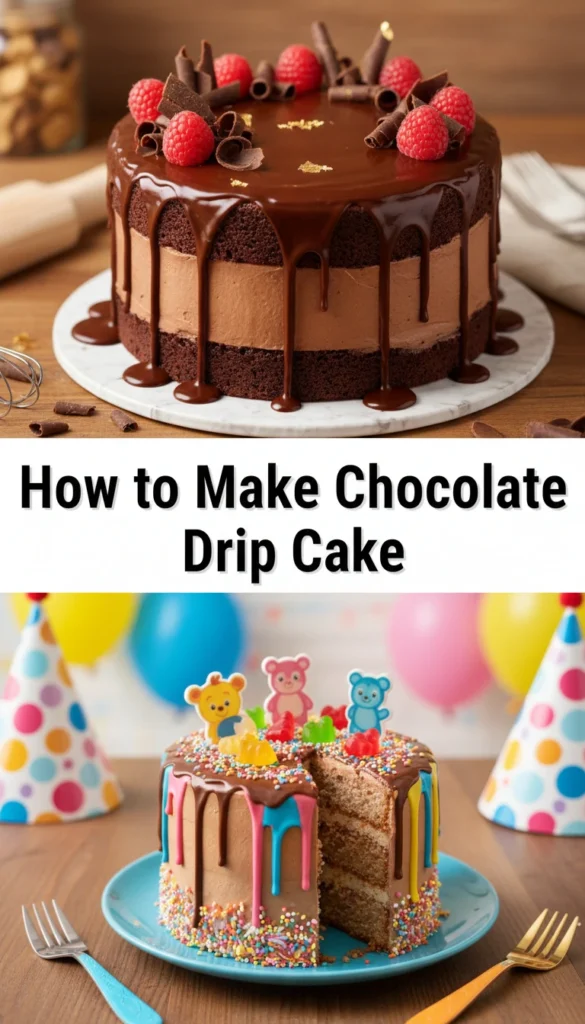
Making a stunning dessert can seem hard for home bakers. But, mastering a chocolate drip cake recipe turns any simple treat into a pro-level masterpiece. These desserts have become super popular on social media because they look amazing and taste great.
To make a chocolate cake decorating masterpiece, you need just a few key items. You’ll use top-notch cocoa powder, heavy cream, and butter to make a smooth ganache. You’ll also need a turntable, offset spatula, and a simple squeeze bottle for applying the ganache just right.
This guide will walk you through every step. We’ll cover the right temperature and the best tools for the job. Learning this skill makes your next birthday or big party truly unforgettable.
Today’s celebrations often feature these stunning desserts. The look of glossy liquid flowing down smooth frosting is unbeatable. It adds a strong look that wows every guest at the table.
What Is a Chocolate Drip Cake?
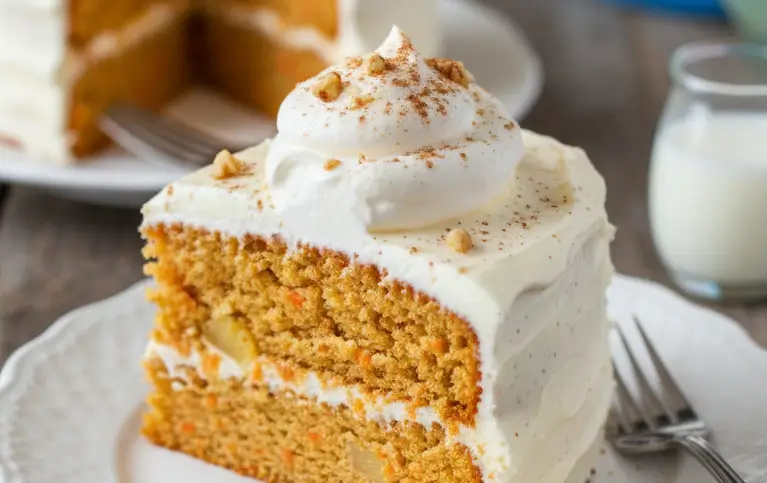
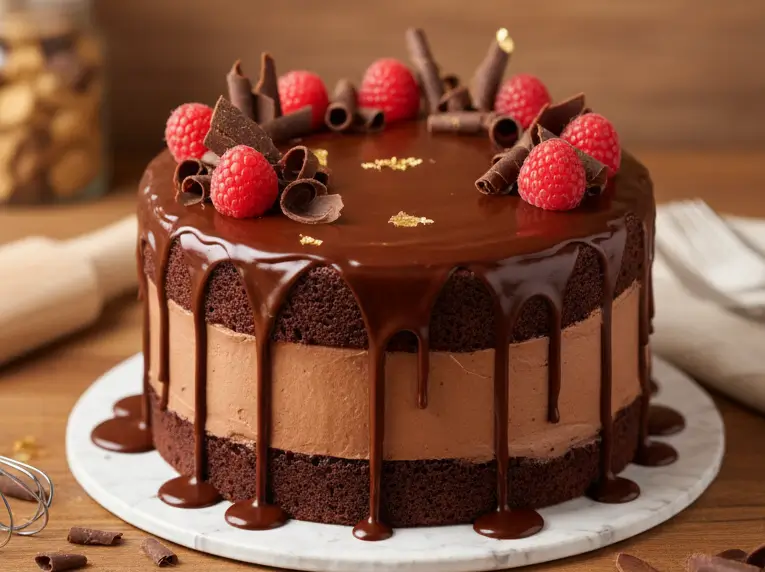
The chocolate drip cake is a modern dessert trend. It’s known for its beautiful chocolate ganache drips. This cake is not just tasty but also a visual delight, making it perfect for celebrations.
A chocolate drip cake has layers of moist chocolate cake. It’s filled with rich buttercream or ganache. Then, it’s covered in frosting and finished with a drizzle of warm chocolate ganache.
The chocolate drip cake is loved for its versatility and stunning look. It’s a hit among bakers and dessert lovers. It’s perfect for any special occasion, like birthdays or weddings.
To make a chocolate drip cake, you need to know the basics. From the cake layers to the ganache drip, each part is important. They all work together to make the cake look and taste amazing.
Essential Ingredients and Materials Needed
Before you start making a chocolate drip cake, know what you need. The quality of your ingredients and tools is key to success.
Cake Ingredients
The cake is the base of your chocolate drip cake. You’ll need:
- 2 cups of all-purpose flour
- 1 cup of granulated sugar
- 2 teaspoons of baking powder
- 1 teaspoon of salt
- 1/2 cup of unsweetened cocoa powder
- 1 cup of whole milk, at room temperature
- 2 large eggs
- 1 teaspoon of vanilla extract
Frosting and Filling Ingredients
For the frosting and filling, you’ll need:
- 2 cups of unsalted butter, softened
- 4 cups of powdered sugar
- 2 teaspoons of vanilla extract
- 4 tablespoons of whole milk
- Optional fillings such as jam or ganache
Chocolate Drip Ingredients
The chocolate drip is a key part of this cake. You’ll need:
- 1 cup of dark or semi-sweet chocolate chips
- 1/2 cup of heavy cream
This mix makes a delicious chocolate ganache recipe for dripping.
Tools and Equipment
Having the right tools is important. Make sure you have:
- Round cake pans (at least 2)
- Mixing bowls and measuring cups
- Electric mixer (stand or handheld)
- Offset spatula
- Turntable for cake decoration
Preparing Your Chocolate Cake Layers
The foundation of a stunning chocolate drip cake lies in its perfectly baked cake layers. To achieve this, it’s essential to follow a meticulous process. This includes mixing the batter, baking, and then cooling the cakes.
To start, let’s delve into the process of mixing the cake batter. This is a critical step that affects the final texture and flavor of your cake.
Mixing the Batter
Mixing the batter for your chocolate cake is a crucial step that requires attention to detail. Ensure all ingredients are at room temperature before you begin. This helps in achieving a smooth batter.
Start by creaming the butter and sugar until it’s light and fluffy. Then, add eggs one at a time, making sure each egg is fully incorporated before adding the next. In a separate bowl, whisk together the dry ingredients.
Alternate between adding the dry ingredients and buttermilk to the butter mixture, beginning and ending with the dry ingredients. Be gentle when folding in the dry ingredients to avoid overmixing, which can result in a dense cake. The batter should be smooth and free of lumps.
Baking Tips for Even Layers
Baking is where the magic happens, turning your mixed batter into beautiful cake layers. To ensure your cakes are even, use cake pans of the same size and bake them in the same oven rack position. Preheat your oven to the right temperature, and consider using baking strips around your pans to promote even baking.
Rotate the cakes halfway through the baking time to counteract any oven hot spots. Check for doneness by inserting a toothpick into the center; it should come out clean or with a few moist crumbs.

Cooling and Leveling the Cakes
Once baked, let the cakes cool in the pans for a few minutes before transferring them to a wire rack to cool completely. It’s crucial to let them cool completely to prevent them from breaking apart when frosted.
If your cakes have domed, you may need to level them. Use a cake leveler or a serrated knife to gently remove the excess cake from the top. This ensures your layers are even and stackable.
Making the Perfect Buttercream Frosting
Getting the perfect buttercream frosting is key for a stunning chocolate drip cake. The right frosting not only tastes amazing but also makes your cake look professional.
First, pick the right buttercream frosting for you. You can choose from American, Swiss, or Italian buttercream. American buttercream is easy to make by beating butter with powdered sugar until it’s light and fluffy. Swiss and Italian buttercreams need cooking sugar and egg whites, making them more stable but harder to make.
Choosing Your Frosting Type
Think about the weather and the event when picking your frosting. For warm weather or outdoor events, Swiss or Italian buttercream is better because they stay stable. For a sweeter frosting, American buttercream is perfect.
- American Buttercream: Easy to make, sweet, and great for most indoor events.
- Swiss Buttercream: More stable, less sweet, and ideal for warmer conditions.
- Italian Buttercream: Very stable, can be less sweet, and great for intricate designs.
Achieving the Right Consistency
The frosting’s consistency is key for decorating. If it’s too thin, it won’t hold its shape. If it’s too thick, it won’t be smooth. The ideal consistency is when it’s smooth, holds its shape when piped, and can still be spread or smoothed.
To change the consistency, add more powdered sugar to thicken or a bit of milk or water to thin it. Make these changes slowly and check often to avoid mistakes.
A simple buttercream frosting recipe starts with beating 2 cups of butter with 4 cups of powdered sugar until it’s light and fluffy. Then, adjust the consistency with milk or water as needed.
Assembling and Stacking Your Cake Layers
To make a stunning chocolate drip cake, you need to learn how to stack cake layers. This involves several important steps. These steps make sure your cake looks great and stays stable.
Creating a Stable Base
The first step is to make a stable base. Start by putting a little frosting or cake glue on the plate or stand. This keeps the first cake layer from moving or falling as you decorate it.
Make sure the first layer is in the middle and has a thin layer of frosting. This layer is the base for the rest of the cake.
Layering and Filling
With the base set, you can start layering and filling your cake. Spread a lot of frosting or filling on the top of the first layer, then add the next one. Keep doing this until all layers are stacked.
It’s important to line up the layers right. This keeps the cake strong and looking good. Use a turntable to check the cake from different sides and fix any issues.
Crumb Coating Technique
After stacking, put a crumb coat on the whole cake. This thin frosting layer catches any crumbs or cake bits, making the final frosting look smooth.
Chill the cake in the fridge for 10-15 minutes to set the crumb coat. This step is key for a professional finish.
By following these steps, you can stack your cake layers confidently. This creates a solid base for your chocolate drip cake.
Applying the Final Frosting Layer
First, stack your cake layers and crumb-coat them. Then, add a smooth final layer of frosting. This layer is key for the chocolate drip and a shiny finish.
Achieving Smooth Sides
To get smooth cake sides, use an offset spatula or a turntable. Spread a lot of frosting on the sides first. Then, use long strokes to make it even.
For a perfect look, chill the cake for a few minutes. Then, use a clean, hot spatula to fix any bumps.
Chilling Before the Drip
After the final frosting, chill the cake to set the frosting. This step, called chilling before the drip, helps the ganache drips stay in shape. Chill it in the fridge for 15-20 minutes before adding the chocolate ganache.
By doing these steps for applying the final frosting layer, you’ll make a stunning chocolate drip cake. It’s sure to wow everyone.
How to Make Chocolate Drip Cake Ganache
To get the signature drip effect on your cake, mastering chocolate ganache is key. This rich, velvety mix is essential for a stunning chocolate drip cake. Making ganache is simple but requires focus on consistency and temperature.
The quality of your ganache greatly affects your cake’s look. A good ganache should be smooth, glossy, and perfect for dripping. You’ll need chocolate and cream to make it.
Perfect Ganache Ratio
The basic ganache ratio is 1:1 (chocolate to cream by weight). But, you can adjust this based on your chocolate type and desired ganache consistency. For a darker ganache, use more chocolate. For a lighter one, add more cream.
For a standard chocolate drip cake ganache, start with high-quality dark chocolate (70% cocoa solids) and heavy cream in a 1:1 ratio. This mix creates a rich, pourable ganache perfect for the drip effect.
Testing the Drip Consistency
It’s important to test your ganache’s consistency before using it. The ideal ganache drips smoothly but doesn’t run too fast. To test, lift some ganache with a spoon and let it drip back into the bowl. If it flows smoothly, it’s ready.
If your ganache is too thick, heat it gently, stirring between each interval, until it’s right. If it’s too thin, let it cool or refrigerate it briefly to thicken.
Proper Temperature for Application
The temperature of your ganache is crucial when applying it. It should be slightly warm, around 85°F to 90°F (29°C to 32°C), for the best dripping. Too hot, and it’s hard to control. Too cool, and it won’t drip well.
To ensure the ganache is at the right temperature, test it by drizzling a small amount on a chilled cake layer or similar surface. Adjust the temperature until you get the desired effect.
Creating the Signature Chocolate Drip Effect
The chocolate drip effect makes a cake stand out. It’s all about the rich, velvety ganache around the cake’s edges. This creates a beautiful, elegant drip down the sides.
Application Techniques
To get the chocolate drip effect right, you need to master ganache application. First, make your ganache as the recipe in Section 8 says. Then, put it in a piping bag or squeeze bottle.
For better control, use a piping bag with a small tip. Gently squeeze the ganache around the cake’s top edge. Let it drip down the sides evenly.
Controlling Drip Length
The drip length is key to your cake’s look. To control it, adjust the ganache’s temperature and frosting’s consistency. Warmer ganache makes longer drips. Cooler ganache makes them shorter.
Filling the Top Surface
Once you’ve got the drip effect, fill the top with ganache or frosting. Use a spatula to spread it evenly. This adds a smooth finish and holds toppings in place.
By following these steps and practicing, you’ll master the chocolate drip effect. Your cake will impress everyone who sees it.
Decorating and Adding Final Touches
Now that your chocolate drip cake is almost done, it’s time to add the finishing touches. This is where you can really show off your creativity. Your cake will become a unique masterpiece.
Think about what look you want for your cake. Do you like simple designs or something more detailed? You can choose, and the techniques below will help you get there.
Piping Techniques
Piping is key in cake decorating. It can make your cake look much better. Piping borders is a good starting point. It frames your cake and gives it a professional look.
- First, pick the right piping tip for your design. A round tip works well for a classic look.
- Practice piping on parchment paper before doing it on the cake.
- Use a turntable to get even coverage and make piping smoother.
Try out different cake decorating techniques like stars, rosettes, or borders. They can add texture and interest to your cake.
Adding Toppings and Embellishments
Toppings and embellishments are the last touches that make your cake special. You can use fresh fruits or chocolate shavings, among other things.
- Pick toppings that match your cake’s flavor and theme.
- Think about the colors and textures you want.
- Put your toppings on carefully, making sure they look good and are spread out right.
With these decorating tips and techniques, you’ll make a chocolate drip cake that’s not just tasty but also looks amazing.
Troubleshooting Common Drip Cake Problems
Making a chocolate drip cake can sometimes go wrong, but knowing how to fix common problems can save the day. Whether you’re an experienced baker or just starting, knowing how to solve cake issues is key. It can make the difference between a perfect cake and a disappointing one.
Ganache Too Thick or Thin
Getting the right consistency for the ganache is a common challenge. If it’s too thick, it won’t flow down the cake sides. If it’s too thin, it’s hard to control and can be messy. To fix this, you can heat or cool the ganache a bit. Heating it in short bursts can make it thinner, while cooling it can thicken it.
Uneven or Broken Drips
Uneven or broken drips can ruin your cake’s look. To prevent this, make sure your cake is chilled well before adding the ganache. This helps the ganache set and stay in shape. If drips are uneven, use a small offset spatula or a knife to guide them.
Frosting Issues
Frosting problems, like an uneven crumb coat or too-soft frosting, can also affect your cake’s look. To avoid these, apply a thin, even layer of frosting for the crumb coat and chill the cake before the final layer. If your frosting is too soft, chilling it for a few minutes can firm it up.
By understanding and fixing these common issues, you can make sure your chocolate drip cake looks great and impresses your guests.
Storage and Serving Recommendations
To keep your chocolate drip cake fresh and looking great, follow these tips. Proper care ensures your cake stays a delight in taste and appearance.
How to Store Your Drip Cake
Storing your chocolate drip cake right is key to keeping it fresh. Here are some tips:
- Store the cake in an airtight container to prevent moisture and other flavors from affecting it.
- Keep the cake in the refrigerator to prolong its freshness. The cold environment will help in setting the ganache and keeping the cake moist.
- If you need to store it for an extended period, consider freezing the cake. Wrap it tightly in plastic wrap and then place it in an airtight container or freezer bag.
When you’re ready to serve, remove the cake from the refrigerator. Let it sit at room temperature for about 30 minutes to 1 hour. This allows the cake to soften slightly, making it easier to slice and serve.
Best Serving Practices
Serving your chocolate drip cake with finesse can elevate the experience. Here are some best practices:
- Use a sharp, thin-bladed knife to slice the cake. This helps in making clean cuts through the cake and the ganache.
- Wipe the knife clean between slices to prevent the ganache from smearing onto the next slice.
- Serve on a decorative plate or cake stand to enhance the visual appeal.
By following these storage and serving tips, you can ensure your chocolate drip cake remains a treat for the eyes and taste buds. Whether you’re serving it at a party or enjoying it with family, these practices will help you get the most out of your delicious creation.
Conclusion
Making a stunning chocolate drip cake is a fun and rewarding task. It mixes creativity with cooking skills. By following this guide, you’ll learn how to make a cake that looks amazing.
To make a great chocolate drip cake, you need to know how to bake a cake, make buttercream frosting, and work with chocolate ganache. With a bit of practice, you’ll create a cake that looks like it was made by a pro.
Now, it’s time to start baking your chocolate drip cake. Try out different flavors and decorations to make it special. Cake decorating is all about being creative and making others happy with your delicious creations.
FAQ
What is the best chocolate to use for a professional-grade ganache drip?
For the best results, choose high-quality couverture chocolate or Ghirardelli Semi-Sweet Baking Bars. These chocolates have more cocoa butter, making the ganache smooth and glossy. They also mix better with heavy cream, creating a stable emulsion.
How can I prevent my chocolate ganache from seizing or becoming grainy?
To avoid seizing, keep chocolate away from water and don’t overheat it. Heat the cream gently and pour it over chopped chocolate in a glass bowl. Wait five minutes before stirring gently with a silicone spatula for a silky texture.
Which specific tools help in achieving perfectly smooth buttercream sides?
Use a heavy-duty spinning turntable and a stainless steel bench scraper from brands like Ateco or Wilton. These tools help you keep the blade steady while rotating the cake. This is key for a flat, vertical surface for even chocolate drips.
Can I use Dutch-process cocoa powder for the chocolate cake layers?
Yes, using premium Dutch-process cocoa like Guittard or Valrhona gives a deeper color and flavor. It’s neutralized, making it great with baking powder for a moist, tender crumb. This is perfect for supporting heavy buttercream layers.
Why did my chocolate drips run all the way down to the cake board?
This happens if the ganache is too warm or the cake isn’t chilled enough. Chill your cake in a Sub-Zero refrigerator for at least 30 minutes. Always test the ganache’s viscosity on the cake’s back before applying it.
What is the best way to apply the ganache if I don’t have a squeeze bottle?
Without a squeeze bottle, use a small offset spatula or spoon to apply the ganache. For precision, a disposable piping bag with a small tip is best. It gives you control over drip length and thickness.
How do I store a chocolate drip cake to prevent condensation on the ganache?
Store the cake in a cardboard box, not airtight plastic. The cardboard absorbs moisture. If refrigerating, remove the cake an hour before serving. This lets the buttercream soften and the chocolate regain its shine.
Can I add color to my chocolate drip?
Yes, but use white chocolate and oil-based food coloring. Water-based dyes will clump the chocolate. Use candy colors from brands like Chefmaster for a smooth, fluid chocolate drip.