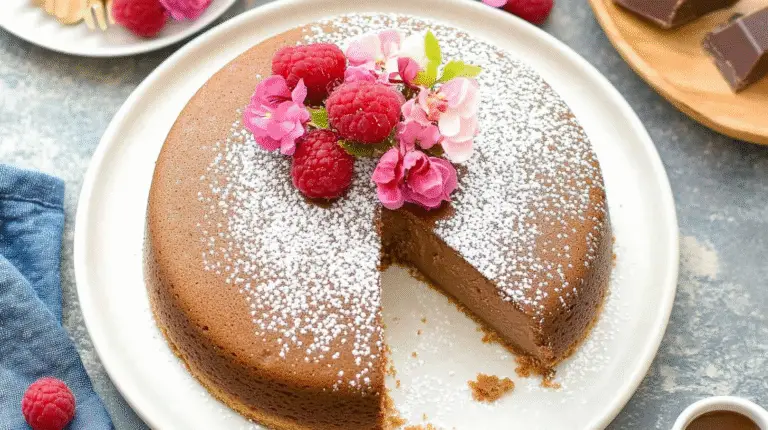
Making the perfect homemade pie crust is key for any baker. The famous Marie Callender’s pie crust recipe is loved for its flaky texture and taste. We’ll show you how to make this beloved crust from scratch.
With just a few ingredients and some tips, you can make a flaky pie crust that will wow everyone. Our guide will take you through the baking steps, so you always get great results.
The Legacy of Marie Callender’s Famous Pie Crusts
Marie Callender’s has been a favorite in American baking for many years. It’s known for its tasty pies and amazing crusts. The brand’s fame comes from a long history and a focus on quality that has won over many pie lovers.

The History Behind the Iconic Pie Brand
Marie Callender’s started with a deep love for baking. This love led to the creation of a beloved pie brand. The company’s story shows the power of traditional recipes and new baking ideas.
Over time, Marie Callender’s stayed true to its roots. It also changed to meet new tastes and preferences.
What Makes Marie Callender’s Pie Crusts Special
So, what makes Marie Callender’s pie crusts unique? It’s the brand’s careful focus on quality and using the best ingredients. The crusts have a special mix that gives them a unique taste and feel.
Key characteristics of Marie Callender’s pie crusts include:
- A flaky, tender texture that melts in your mouth
- A rich, buttery flavor that complements a variety of fillings
- A delicate balance of ingredients that ensures consistency and quality
By knowing what makes Marie Callender’s pie crusts special, home bakers can try to make similar ones.
Essential Ingredients for the Perfect Marie Callender’s Pie Crust Recipe
Marie Callender’s pie crust recipe uses basic baking ingredients. Each ingredient plays a vital role. The right mix of ingredients is key to getting that flaky texture and taste.

Key Ingredients and Their Purpose
The main ingredients in Marie Callender’s pie crust are all-purpose flour, cold unsalted butter, and ice-cold water. Flour gives the crust its structure. Cold butter is essential for flaky layers. Ice-cold water keeps the butter from melting, making the dough flaky.
- All-purpose flour: Provides structure and texture.
- Cold unsalted butter: Creates flaky layers.
- Ice-cold water: Helps maintain the butter’s solidity.
- Salt: Enhances flavor.
Ingredient Substitutions and Alternatives
If you have dietary restrictions, you can substitute some ingredients. For gluten-free diets, use gluten-free flour instead of all-purpose flour. For a dairy-free version, swap unsalted butter with vegan butter.
- Use gluten-free flour for a gluten-free crust.
- Replace unsalted butter with vegan butter for a dairy-free option.
- Try different sugars or salts to change the flavor a bit.
Kitchen Tools and Equipment You’ll Need
Having the right kitchen tools and equipment is key to making Marie Callender’s Pie Crust. The right tools make the process easier and help your pie crust turn out flaky and delicious.
Essential Baking Tools
You’ll need some basic baking tools that you might already have. These include a large mixing bowl, a measuring cups set, and a measuring spoons set. You’ll also need a pastry blender or your fingers to mix the fat into the flour, and a rolling pin to roll out the dough. Don’t forget a pie dish for baking your pie crust.
- Large mixing bowl
- Measuring cups and spoons
- Pastry blender or fingers
- Rolling pin
- Pie dish
Optional Equipment for Better Results
While not essential, some extra equipment can make making Marie Callender’s Pie Crust easier. A pastry mat prevents the dough from sticking to your work surface. A bench scraper is handy for scraping dough off the counter. A marble rolling surface keeps your dough cool, which is good for a flaky crust.

Preparing Your Workspace and Ingredients
To get great results, start by organizing your kitchen and ingredients. A clean and organized kitchen helps you make the Marie Callender’s pie crust recipe better.
Setting Up Your Kitchen for Success
First, clear your countertops and get all the tools and ingredients ready. You’ll need measuring cups, spoons, a mixing bowl, and your ingredients. Having everything close by makes baking easier and less likely to go wrong. Proper kitchen preparation is crucial for a smooth baking experience.
Proper Ingredient Temperature and Preparation
Make sure your ingredients are at the right temperature. Cold butter and ice-cold water are key for a flaky pie crust. Take your time to measure and prepare your ingredients as the recipe says. Ingredient temperature greatly affects your pie crust’s final taste.

Step-by-Step Marie Callender Pie Crust Recipe
To make a real Marie Callender’s pie crust, follow this easy guide. It breaks down the process into simple steps. Making a homemade pie crust might seem hard, but with the right steps, you’ll get a flaky and delicious crust.
Mixing the Dry Ingredients
The first step is to mix the dry ingredients. In a big bowl, mix 2 1/4 cups of all-purpose flour, 1 teaspoon of salt, and 1 tablespoon of granulated sugar. Whisk until they’re well mixed. This step is key to get a crust with even flavor and texture.
Incorporating the Fat
Next, add the fat to the dry ingredients. Marie Callender’s crust is flaky and buttery thanks to butter and shortening. Cut 1/2 cup of cold unsalted butter and 1/4 cup of shortening into small pieces. Add them to the dry ingredients. Use a pastry blender or your fingers to mix until it looks like coarse crumbs with some fat pieces left.
Adding Liquid and Forming the Dough
Now, add the liquid ingredients. Sprinkle 1/4 cup of ice-cold water over the mixture. Then, use a fork to mix gently. Don’t overwork the dough. It should form a shaggy mass. If it’s too dry, add a bit more water, but not too much.
When the dough starts to come together, shape it into a ball. Turn it onto a floured surface and knead it a bit. This ensures it’s evenly mixed.
Chilling the Dough Properly
Chilling the dough is crucial. It relaxes the gluten, making the dough easier to roll out. Wrap the dough in plastic wrap and chill for at least 1 hour or up to 2 days. If you’re in a hurry, chill it for 30 minutes in the freezer. Just make sure to wrap it tightly to avoid freezer burn.
By following these steps, you’ll make a delicious Marie Callender’s style pie crust. Remember, practice makes perfect. Don’t worry if your first try isn’t perfect.
Rolling and Shaping Your Pie Crust
Now that you have your homemade Marie Callender’s pie crust dough ready, let’s move on to the rolling and shaping process. This step is crucial in achieving a perfectly baked pie crust.
Techniques for Even Rolling
To roll out your pie crust evenly, start by lightly flouring your surface to prevent sticking. Use a rolling pin to gently roll out the dough, beginning from the center and moving outwards in all directions. Rotate the dough 90 degrees after every few rolls to ensure even thickness.
Tip: Keep your rolling pin cool by refrigerating it for a few minutes before use, especially if you’re working with a particularly sticky dough.
Transferring to the Pie Plate Without Tearing
Once your dough is rolled out to the desired thickness, it’s time to transfer it to your pie plate. To do this without tearing, gently fold the dough in half or roll it onto your rolling pin, then unroll or unfold it over the pie plate. Trim any excess dough from the edges, leaving enough to form a decorative crust.
Be gentle when handling the dough to avoid stretching or tearing it.
Creating Decorative Edges
A decorative edge not only adds visual appeal but also helps to seal the pie crust during baking. You can create a simple crimped edge by using your thumb and index finger to press the dough into a fluted pattern. Alternatively, use a fork to press a decorative border around the edge.
- Crimping: Use your fingers to create a scalloped edge.
- Fork Press: Press a fork around the edge for a simple, classic look.
- Roping: Roll out excess dough, roll it into a rope, and shape it into a circle to place on the edge.
Blind Baking Techniques for Different Pie Types
To get your pie crust just right, learning about blind baking is crucial. Blind baking, or pre-baking, is used when the filling cooks for less time than the crust. It’s vital for pies with wet fillings or those that don’t bake, like custard or cream pies.
When to Blind Bake Your Crust
Blind bake your crust for pies with fillings that don’t bake or bake for less time than the crust. This includes custard pies, cream pies, and no-bake fillings. It stops the crust from getting soggy.
- Custard or cream fillings
- No-bake fillings
- Fillings with high moisture content
How to Prevent Shrinking and Bubbling
To stop the crust from shrinking and bubbling, chill your crust first. Use pie weights or dried beans to keep it flat. Make sure the crust is rolled out evenly to avoid thick spots that can bubble up. Pricking the bottom with a fork can also prevent bubbling.
Partial vs. Full Blind Baking
Choosing between partial and full blind baking depends on the type of pie. For baking pies, like fruit pies, partial blind baking is enough. For pies with no-bake fillings, full blind baking is needed. Partial blind baking bakes the crust until it’s lightly golden. Full blind baking cooks it until it’s fully golden and done.
- Partial blind baking for pies that will be baked further
- Full blind baking for pies with no-bake fillings
Storing and Freezing Your Homemade Pie Crust
Knowing how to store and freeze pie crust is key to enjoying your baking. Proper methods keep your homemade Marie Callender’s pie crust fresh for later use.
Short-Term Storage Methods
For short-term, keep your pie crust in the fridge. Wrap it tightly in plastic wrap or foil to avoid drying. Use it within 2 days for the best taste.
- Keep it away from strong-smelling foods, as the dough can absorb odors.
- Label the wrapped dough with the date.
- Store it at a consistent refrigerator temperature.
Freezing Unbaked Pie Crusts
Freezing is great for longer storage. Here’s how to freeze your pie crust:
- Wrap the dough tightly in plastic wrap or aluminum foil.
- Place the wrapped dough in a freezer-safe bag.
- Label the bag with the date and contents.
Thawing and Using Frozen Crusts
Ready to use your frozen pie crust? Thaw it right to keep its quality. Thaw in the fridge overnight or at room temperature for a few hours. Then, follow your recipe.
Tips for Best Results:
- Avoid thawing at high temperatures, as this can cause the crust to become soggy.
- Use the thawed crust immediately for the best results.
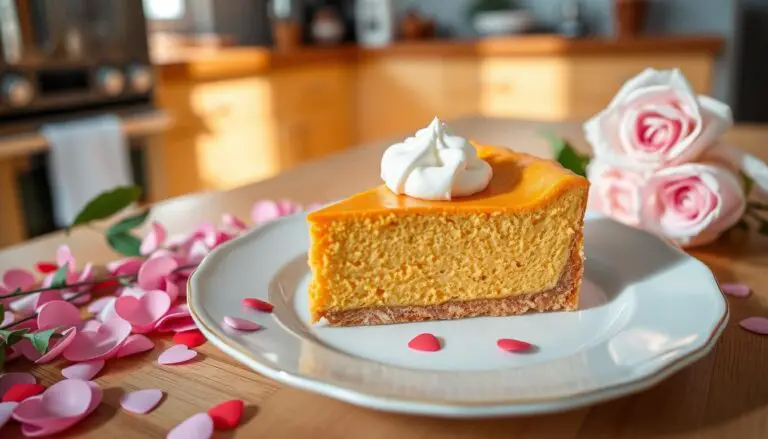
Perfect Fillings for Your Marie Callender’s Style Crust
Now that you’ve got the Marie Callender’s pie crust down, it’s time to try out different fillings. The right filling can take your pie to the next level. Whether you want something sweet, savory, or seasonal, there’s a filling for you.
The Marie Callender’s pie crust is super versatile. It’s a great base for any pie filling you can think of.
Classic Sweet Pie Fillings
Apple, cherry, and blueberry fillings are always a hit. They’re made with fresh or canned fruits, sugar, and spices. This mix creates a perfect balance of flavors.
For example, a traditional apple pie filling has tender apples, cinnamon, and a bit of nutmeg. It’s a delicious choice for any occasion.
Savory Filling Options
Savory pies are great for brunch or dinner. You can try fillings like chicken pot pie with tender chicken, veggies, and creamy sauce. Or, a spinach and feta pie is a tasty alternative to sweet pies.
These savory options are flexible and can be tailored to fit different diets. They’re perfect for a wide range of people.
Seasonal Filling Inspirations
Seasonal ingredients can lead to unique pie fillings. Pumpkin and apple fillings are great for fall. Meanwhile, lemon and strawberry fillings are perfect for spring.
Using seasonal ingredients makes your pies fresh and relevant. It keeps your baking exciting and dynamic.
Conclusion
Learning to bake at home is very rewarding. Making Marie Callender’s pie crust is a great first step. By following this guide, you’ll make pies that wow everyone.
Success comes from knowing the right techniques and ingredients. Preparing your space and ingredients is key. Rolling and shaping your crust is also important for a perfect pie.
As you keep practicing, you’ll get better at baking. You can try different fillings and variations. Marie Callender’s crust is great for both sweet and savory pies.
In short, baking Marie Callender’s pie crust is a journey. It takes patience, practice, and detail. With this guide, you’re ready to start and enjoy the fruits of your labor.
FAQ
What is the key to making a flaky Marie Callender’s pie crust?
To make a flaky crust, use cold butter and ice water. Don’t overwork the dough.
Can I substitute the type of fat used in Marie Callender’s pie crust recipe?
Yes, you can swap out the fat. But, mixing butter and shortening gives the best taste and texture.
How do I prevent my pie crust from shrinking during baking?
Chill the dough well before baking. Don’t overwork it. Blind baking with pie weights also helps.
What is blind baking, and when is it necessary?
Blind baking means baking the crust without filling. It’s needed for fillings that bake faster than the crust.
Can I freeze Marie Callender’s pie crust dough?
Yes, you can freeze the dough. Wrap it in plastic or foil and keep it in the freezer for up to 3 months.
How do I thaw frozen pie crust dough?
Thaw the dough in the fridge overnight or at room temperature for a few hours. Don’t microwave it.
What are some classic fillings that go well with Marie Callender’s pie crust?
Try apple, cherry, or pumpkin for sweet pies. For savory, use chicken or vegetables.
How do I achieve a decorative edge on my pie crust?
Crimp the edges with your fingers or a fork. Or, use a pastry brush for patterns.
Can I make Marie Callender’s pie crust by hand, or do I need a food processor?
You can make it by hand with a pastry blender or your fingers. Or, use a food processor for speed.
How do I store leftover pie crust?
Keep leftover crust in an airtight container in the fridge for up to 3 days. Freeze it for longer storage.