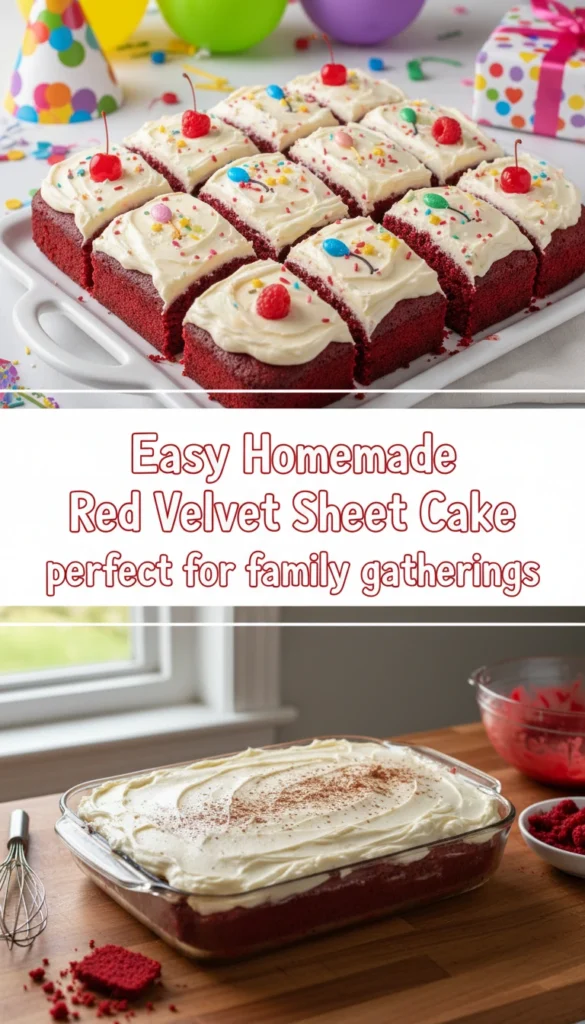
Baking at home brings warmth to your kitchen. This red velvet sheet cake recipe is easy to make for a big crowd. It has a classic cocoa taste and a beautiful red color.
- Fast Preparation: Using a rectangular pan makes it easy to prepare.
- Crowd Friendly: It’s perfect for feeding a large family.
Choosing a flat style saves time on frosting and stacking. This cake stays moist and tender. The creamy frosting looks great on its smooth surface.
For these treats, you need basic items like buttermilk and vinegar. They mix to create a light texture everyone loves. Getting your supplies ready is the first step to baking success.
Every home baker wants a reliable recipe for great results. This single pan method makes it easy. It ensures everyone gets a tasty piece of the colorful cake.
The mix of tangy and sweet flavors is famous. You can make it like a pro without spending hours in the kitchen. This homemade red velvet cake is a hit at parties and family gatherings.
What Makes This Red Velvet Sheet Cake Special
This red velvet sheet cake is special for many reasons. Its moist texture is a big plus. It’s made by carefully mixing ingredients and baking.
The cake also has a subtle cocoa flavor. This flavor adds depth without being too strong. The vibrant red color is eye-catching and comes from top-notch food coloring.
The mix of moist texture, subtle cocoa flavor, and bright red color makes this cake a hit. It’s great for special occasions and large gatherings. Its size and color make it stand out.
- Moist texture from balanced ingredients and careful baking
- Subtle cocoa flavor adding depth to the cake
- Vibrant red color from high-quality food coloring
This red velvet sheet cake is not just tasty but also looks amazing. It’s sure to wow at any event.
Why You’ll Love This Recipe
Making a red velvet sheet cake is a great idea for any event. It has many benefits that set it apart from other cakes.
Perfect for Feeding a Crowd
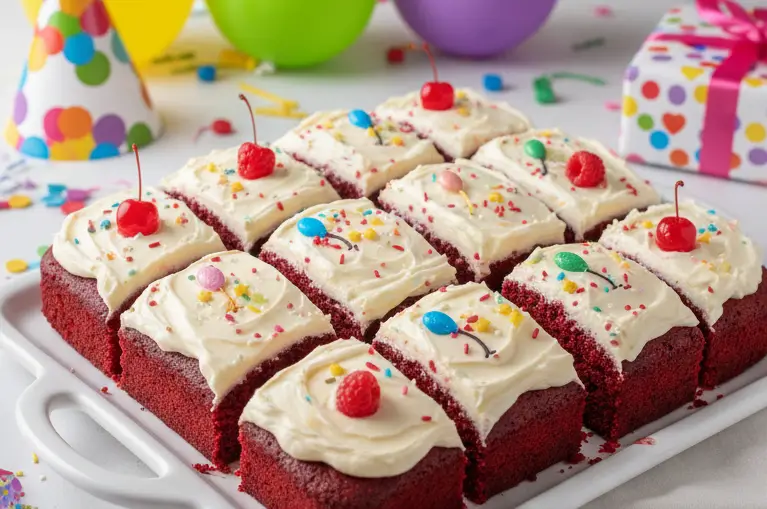
A sheet cake is perfect for big gatherings like birthday parties, weddings, or holiday celebrations. It offers a lot of cake that’s easy to cut into equal pieces. This way, everyone gets a fair share.
- Feeds a large number of people
- Easy to serve
- Perfect for events and parties
Simple Ingredients You Already Have
This recipe uses common ingredients you probably have at home. It’s easy on your wallet and convenient.
- Flour
- Sugar
- Cocoa powder
- Eggs
Less Fussy Than Layer Cakes
Unlike layer cakes, which need careful layering, a sheet cake is easy to make. Just pour the batter into a pan and bake.
This simplicity is great for both new and experienced bakers. It’s a stress-free dessert option.
Ingredients and Materials Needed
Before you start making a tasty red velvet sheet cake, gather all the ingredients and materials you need. Having everything ready will make baking easier and more fun.
Cake Ingredients
The cake ingredients are the base of your red velvet sheet cake. You’ll need:
- 2 cups all-purpose flour
- 1 cup granulated sugar
- 2 teaspoons baking powder
- 1 teaspoon salt
- 1 cup unsalted butter, softened
- 2 large eggs
- 2 large egg yolks
- 2 teaspoons red food coloring
- 1 teaspoon vanilla extract
- 1 cup buttermilk
Make sure you have these high-quality ingredients for the best taste and texture.
Cream Cheese Frosting Ingredients
For the cream cheese frosting, you’ll need:
- 8 ounces cream cheese, softened
- 1/2 cup unsalted butter, softened
- 2 cups powdered sugar
- 1 teaspoon vanilla extract
Using high-quality cream cheese and real butter will greatly improve your frosting’s taste and texture.
Essential Baking Tools and Equipment
Having the right baking tools and equipment is as crucial as having the right ingredients. You’ll need:
- A 9×13-inch sheet pan
- Non-stick cooking spray or parchment paper
- A large mixing bowl
- An electric mixer (stand or handheld)
- A measuring cup and spoons
With these essential baking tools, you’re ready to make a delicious red velvet sheet cake.
Preparing Your Kitchen and Pan
Before you start mixing your red velvet sheet cake ingredients, prepare your kitchen and pan. This is key for even baking and a perfect cake.
Preheating and Rack Placement
Preheating your oven is a must. Set it to 350°F (175°C) and wait until it’s fully ready. Also, place your oven rack in the middle for even baking. This ensures the cake’s texture is consistent.
Tip: Preheating your oven correctly is crucial for the cake’s texture and structure. If your oven isn’t preheated right, the cake might bake unevenly.
Greasing and Preparing the Sheet Pan
Greasing your sheet pan well is important to prevent the cake from sticking. Use a lot of butter or cooking spray and dust it with flour. This makes the cake easy to remove after baking. Or, you can use parchment paper for easy cleanup and to prevent sticking.
By following these steps, you’re on your way to baking a delicious red velvet sheet cake. Proper kitchen and pan preparation is the first step to a successful baking experience.
How to Make Red Velvet Sheet Cake Batter
Making red velvet sheet cake batter is simpler than you might think. It starts with knowing how to mix the ingredients. The right mix of ingredients and techniques is key to a great batter.
Step 1: Combining Dry Ingredients
Start by mixing the dry ingredients in a bowl. Whisk together flour, cocoa powder, baking powder, and salt. This makes sure they’re spread out evenly in the batter. It’s important for the cake’s texture and taste.
Step 2: Creaming Butter and Sugar
Then, mix the butter and sugar in a big bowl until they’re light and fluffy. This step adds air to the batter. It makes the cake moist and soft. Use room temperature butter for the best results.
Step 3: Adding Eggs and Food Coloring
After that, add eggs one at a time. Make sure each egg is fully mixed before adding the next. This helps the batter stay smooth. Then, add red food coloring and mix until it’s evenly spread. Choose a good quality food coloring for the best color.
Step 4: Alternating Wet and Dry Ingredients
Now, mix the wet and dry ingredients in turns. Start and end with the dry ingredients. This keeps the batter just right, not too thick or too thin. It’s a key step for the perfect cake consistency.
Step 5: Adding Vinegar and Baking Soda
Finally, add vinegar and baking soda. These help the cake rise. Add them towards the end to work best.
By following these steps and mixing carefully, you’ll make a red velvet sheet cake batter. It will result in a tasty and beautiful cake.
Baking Your Red Velvet Sheet Cake
Now that your batter is ready, it’s time to bake it. The baking process is key for the right texture and flavor.
Pouring and Spreading the Batter
Pour the batter into your greased and floured sheet pan. Use a spatula to spread it evenly. Make sure it covers all corners of the pan. This helps the cake bake evenly.
Baking Time and Temperature
Preheat your oven to 350°F (175°C). A red velvet sheet cake usually bakes for 20 to 25 minutes. The exact time depends on your oven and the cake’s thickness. Keep an eye on it as it nears the baking time.
Key baking tips:
- Ensure your oven is at the correct temperature.
- Don’t open the oven door too often, as this can affect the cake’s texture.
- Use the middle rack to promote even baking.
Testing for Doneness
To check if your cake is done, insert a toothpick into the center. If it comes out clean or with a few moist crumbs, it’s ready. You can also gently press the top; if it springs back, it’s done.
Cooling the Cake Properly
After baking, remove the cake from the oven and let it cool in the pan for about 10 minutes. Then, transfer it to a wire rack to cool completely. This step is crucial for preventing the cake from becoming soggy or developing hot spots.
Proper cooling ensures that your cake retains its moisture and texture.
Making the Perfect Cream Cheese Frosting
To make your red velvet sheet cake even better, a great cream cheese frosting is key. This frosting adds a tangy flavor that contrasts the cake’s sweetness. It also makes the cake look amazing.
Bringing Ingredients to Room Temperature
First, make sure your ingredients are at room temperature. This makes the cream cheese and butter mix smoothly. Take them out of the fridge 30 minutes to an hour before you start.
Beating Cream Cheese and Butter
In a big bowl, beat the softened cream cheese and butter until they’re smooth. This should take 2-3 minutes with a mixer on medium speed. Make sure both are at room temperature to avoid lumps.
Adding Powdered Sugar and Vanilla
Slowly add powdered sugar to the cream cheese mix, beating well after each addition. This prevents lumps and keeps the frosting even. Add vanilla extract and mix until it’s well combined. The powdered sugar adds sweetness and helps with the frosting’s consistency.
Achieving the Right Consistency
The frosting should be smooth and spreadable but not too thin. If it’s too thick, add a little milk or heavy cream. If it’s too thin, add more powdered sugar. Finding the perfect balance is key to complementing your red velvet sheet cake.
- Check the consistency by lifting some frosting with a spatula; it should hold its shape.
- If you’re frosting the cake ahead of time, refrigerate it and let it come to room temperature before serving.
- For a lighter frosting, you can add more cream or milk, but do so gradually to avoid making it too thin.
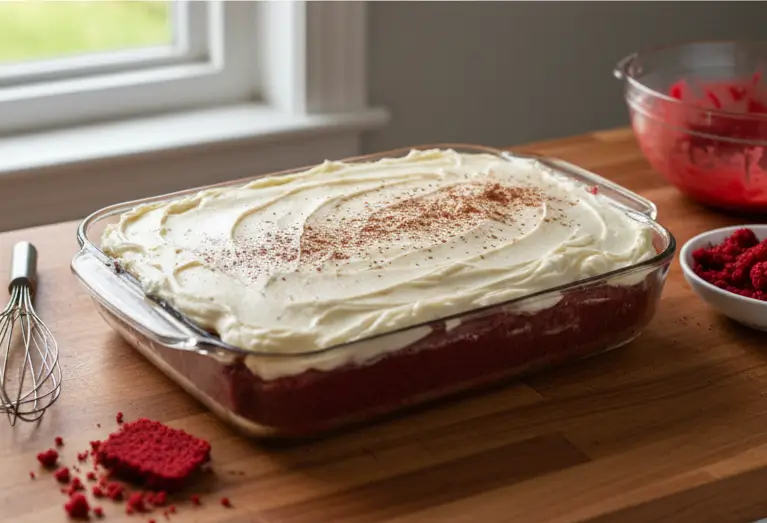
Frosting and Decorating Your Sheet Cake
After baking and cooling your red velvet sheet cake, it’s time to add the final touches. This step is key as it adds flavor and beauty to your cake.
When to Frost the Cake
Frost your cake when it’s completely cool. Frosting a warm cake can make the frosting melt, ruining the look. Wait until your cake reaches room temperature before frosting.
Applying the Frosting Evenly
To frost evenly, start with a big dollop on top. Use an offset spatula or butter knife to spread it. For a smooth finish, dip your spatula in hot water, wipe it clean, and then smooth the frosting.
Simple Decoration Ideas
Decorating your red velvet sheet cake can be simple yet stunning. Here are a few ideas:
- Fresh Flowers: Use edible flowers or roses for elegance.
- Chopped Nuts: Sprinkle chopped nuts around the edges or on top for texture.
- Cocoa Powder: Dust a light layer of cocoa powder on top for sophistication.
These decoration ideas are easy to do and make your cake look great. They’re perfect for any special occasion.
Expert Tips for the Best Red Velvet Sheet Cake
To make your red velvet sheet cake amazing, follow these expert tips. Baking a red velvet sheet cake is easy with the right advice. We’ll share tips on getting the perfect red color, making it moist and tender, and avoiding common problems.
Getting the Perfect Red Color
The red color of a red velvet cake is its standout feature. Use high-quality red food coloring for baking. Gel or paste food coloring works best because they give a brighter color than liquid. Start with a little and add more until you get the right shade. The color will deepen as it bakes.
Achieving Moist and Tender Texture
A moist and tender texture is key for a great red velvet sheet cake. Choose the right flour; cake flour is better than all-purpose flour because it’s lower in protein. This makes the cake tender. Also, don’t overmix the batter. Stop mixing when the ingredients are just combined.
Preventing Common Baking Issues
Issues like a dry or unevenly baked cake can be avoided with simple steps. Make sure your ingredients are at room temperature before mixing. This helps the batter mix evenly and bake well. Also, rotate your sheet pan halfway through baking to avoid hot spots in your oven.
By using these expert tips, you’ll bake a red velvet sheet cake that looks great and tastes amazing. It will be moist and tender.
Common Mistakes to Avoid
To make sure your red velvet sheet cake is perfect, knowing the common baking mistakes is key. These mistakes are easy to avoid with a bit of knowledge.
Baking a red velvet sheet cake is simple if you watch out for common errors. Here are some mistakes to avoid.
Overmixing the Batter
One big mistake is overmixing the batter, which makes the cake dense. Just mix until the ingredients come together, then stop.
Using Cold Ingredients
Using cold ingredients can mess up your cake’s texture. Make sure your butter, eggs, and buttermilk are room temperature before starting.
Frosting While the Cake Is Too Warm
Frosting a warm cake can melt the frosting. Wait until the cake is completely cool before adding the cream cheese frosting.
By steering clear of these mistakes, you’ll make a tasty and beautiful red velvet sheet cake.
Storage and Serving Suggestions
Keeping your red velvet sheet cake fresh and looking good is key. Whether it’s for a big event or just for a few days, knowing how to store and serve it is important.
How to Store Your Sheet Cake
To keep your cake fresh, store it right. If you’ll eat it in a few days, keep it at room temperature or in the fridge. Cover it tightly with plastic wrap or aluminum foil to stop it from drying out. If you refrigerate it, let it come to room temperature before serving for the best taste and texture.
For longer storage, wrap the cake in plastic wrap and then in an airtight container. This keeps it moist and fresh.
Freezing Instructions
Freezing is great for longer storage. First, make sure the cake is completely cooled. Then, wrap it tightly in plastic wrap. You can also add aluminum foil for extra protection against freezer burn. Put the wrapped cake in a freezer-safe bag or airtight container.
When you’re ready to serve, thaw the cake in the fridge overnight. After thawing, let it come to room temperature before frosting or serving.
Best Ways to Serve
Serving your red velvet sheet cake can be simple or creative. For a classic look, cut it into squares or rectangles and serve on a decorative plate or cake stand. You can also add a garnish like fresh berries or chopped nuts for extra flair.
Try serving the cake with whipped cream or vanilla ice cream for a special treat. The main thing is to make it look appealing to your guests.
Conclusion
Baking a red velvet sheet cake is easy and rewarding. This guide shows you how to make a tasty and beautiful dessert for any event.
A red velvet sheet cake summary shows it’s moist, has a hint of cocoa, and looks amazing. To get the best cake, use room temperature ingredients. Also, don’t overmix the batter and frost it when it’s cool.
After making this cake, you’ll see it’s all worth it. The cake’s deep flavor and the tangy frosting will wow everyone.
Now, it’s time to bake and enjoy your hard work. With this recipe, you’ll become a pro at making red velvet sheet cakes. Your creations will be a big hit at any party.
FAQ
Can I use natural cocoa powder instead of Dutch-processed for this recipe?
Yes, natural cocoa powder like Hershey’s works great. It’s traditional for red velvet because it reacts with vinegar and baking soda. This reaction brings out the cake’s reddish hue. Dutch-process cocoa also works well, but it might make the color deeper.
What is the secret to achieving a bright red color without a chemical aftertaste?
Use gel food coloring, like AmeriColor Soft Gel Paste in Super Red. Gel coloring is concentrated, so you need less of it. This prevents a metallic or bitter taste in the batter.
Why is buttermilk necessary for a red velvet sheet cake?
Buttermilk is key because it breaks down flour’s gluten. This makes the cake tender and moist. The buttermilk’s tang also complements the cocoa flavor, making the cake unique.
Which cream cheese brand works best for the frosting?
Philadelphia Cream Cheese is the best for a creamy frosting. When whipped with butter and powdered sugar, it’s perfect. It’s thick enough for a large sheet pan without being too runny.
How do I prevent the sheet cake from sticking to the pan?
Grease your Nordic Ware sheet pan with butter or non-stick spray. Then, line the bottom with parchment paper. This ensures the cake comes out clean, which is crucial for serving.
Can I prepare the cream cheese frosting in advance?
Yes, you can make the frosting up to three days early. Store it in an airtight container in the fridge. Before using, let it sit at room temperature for 15 minutes. Whip it lightly to restore its fluffiness. Add a teaspoon of Nielsen-Massey vanilla extract for a floral aroma.
How should I store leftovers to keep them fresh?
Store the cake in the fridge because of the cream cheese frosting. Place it in a container or cover the pan tightly. This keeps it moist for up to five days.