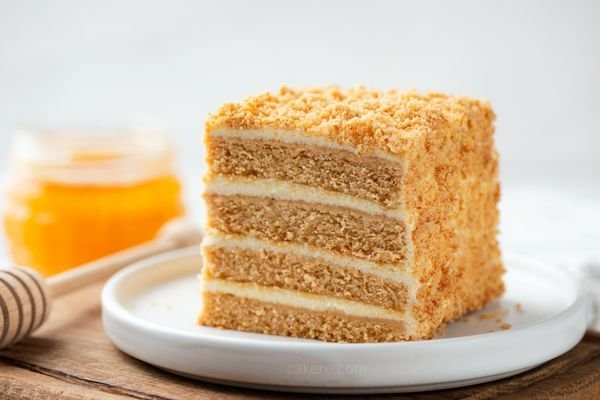
Cake layers should be between 1 and 2 inches thick.
There’s no definitive answer to this question – it depends on personal preference and the type of cake you’re making. Generally speaking, cake layers should be around 1-2 inches thick for a standard size cake.
However, if you’re making a taller cake or one with multiple layers, you may want to make the layers thinner (around 1 inch) so that the cake is easier to cut and serve.
How Thick Should Each Layer Be on a 4 Layer Cake?
A four-layer cake should have three layers of cake and one layer of filling. The ideal thickness for each layer is about 1 inch, but this may vary depending on the recipe. The top and bottom layers of cake should be slightly thinner than the middle layer, so that the filling doesn’t spill out when you cut into the cake.
What Size Should Cake Layer Be?
There’s no definitive answer to this question since it depends on the size and shape of your cake pan, as well as how many layers you want in your cake. However, a good rule of thumb is to make each layer about 1 inch thick. This will give you a nice, tall cake that’s easy to slice and serve.
Why are My Cake Layers Thin?
If your cake layers are thin, it’s most likely due to one of three things: the recipe, the ingredients, or the baking method. Let’s take a closer look at each of these factors. The Recipe
If you’re following a recipe to the letter and your cake layers are still coming out thin, it might be time to try a different recipe. Some recipes simply produce thinner layers than others. This isn’t necessarily a bad thing – sometimes thin layers are exactly what you’re going for (think: wedding cakes).
But if you’re looking for nice, thick cake layers, it might be time to switch up your recipe. The Ingredients Another possible reason for thin cake layers is that your ingredients aren’t quite right.
For example, if you’re using self-rising flour instead of all-purpose flour, your cake will probably be on the thinner side. It’s important to measure your ingredients accurately and use the type of flour called for in the recipe. Otherwise, you might end up with less-than-ideal results.
How Much Should I Fill between Cake Layers?
Assuming you’re talking about filling cake layers with frosting, the amount you use is up to you. Some people like to put a thick layer of frosting in between their cake layers, while others prefer a thinner layer. It all comes down to personal preference.
If you’re using a buttercream frosting, a good rule of thumb is to use about 1/2 cup of frosting per layer. If you’re using a different type of frosting, you may need more or less depending on how sweet it is and how dense the consistency is. Experiment until you find what works best for you!
How Tall Should Cake Layers Be
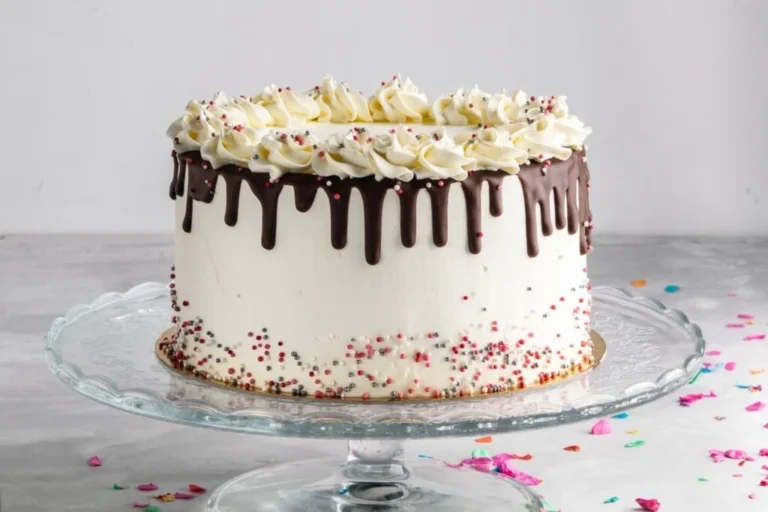
When it comes to cake, there are a lot of different opinions on how tall each layer should be. Some people say that each layer should be about an inch tall, while others believe that they should be closer to two inches. Ultimately, it really depends on personal preference and the overall look you are going for with your cake.
If you want a towering cake with lots of height, then you will obviously need to make your layers taller. However, if you are looking for a more modest cake, then shorter layers may be the way to go. Experiment with different heights until you find what works best for you!
How Tall Should a 3 Layer Cake Be
When it comes to layer cakes, the sky’s the limit—literally! There is no “right” answer when it comes to how tall your cake should be. It all depends on your personal preference and the overall look you are going for with your dessert.
If you want a towering cake that will make a statement, go for it! Three layers of cake can easily reach heights of 6 inches or more. Just be sure to use sturdy cake boards and dowels to support all that weight.
And if you’re worried about cutting into such a tall cake, simply bake two sheet cakes and stack them on top of each other. Then you can cut neat slices without having to worry about toppling over your masterpiece. On the other hand, you may prefer a more modest cake that is easier to serve (and eat!).
In this case, 3-inch layers are probably plenty. You can even get away with 2-inch layers if you want something on the smaller side. Whatever height you choose, just be sure all three layers are even so your cake looks symmetrical when sliced.
How to Stack Cake Tiers
If you’re planning on having a multi-tiered cake at your wedding or special event, you’ll need to know how to stack the cake tiers correctly. Here’s a step-by-step guide to stacking cake tiers: 1. First, you’ll need to level off the top of each cake layer.
Use a serrated knife to do this – it will make it easier to get a level surface. 2. Next, put down a layer of cardboard or another firm base on which to stack the cake layers. This will help prevent the layers from sliding around while you’re working with them.
3. Now, take your first cake layer and place it upside down on the base (so that the flat surface is now facing up). Spread a thin layer of frosting over the top of this layer. 4. Take your second cake layer and place it right side up on top of the first one (so that the two flat surfaces are now touching).
Once again, spread a thin layer of frosting over the top of this second layer. Repeat this process until all layers are stacked.
How to Stack Round Cake Layers
When it comes to stacking round cake layers, there are a few things you need to keep in mind. First, make sure that your cake layers are all level. If they’re not, then your cake will be lopsided and won’t look very good.
Second, use a board or plate that is slightly larger than the bottom layer of cake. This will give you something to grip onto when you’re stacking the layers. Finally, use some sort of filling between each layer – buttercream frosting works well for this.
Now that you know the basics, let’s get started! Begin by leveling off your bottom cake layer. Then, place your next cake layer on top of it and spread a generous amount of filling in between the two layers.
Be sure to smooth it out so that there are no air pockets. Repeat this process until all of your cake layers are stacked. If you want to get really fancy, you can try using different fillings between each layer – like chocolate ganache or raspberry jam.
Get creative and have fun with it!
How to Stack a 4 Layer Cake
When it comes to baking, there are few things as impressive as a four-layer cake. Not only does it look amazing, but it also tastes delicious! If you’re looking to impress your friends and family with your baking skills, then this is the recipe for you.
The first thing you need to do is make sure that you have all the ingredients and supplies that you need. This includes four 8-inch round cake pans, cake flour, sugar, butter, eggs, vanilla extract, baking powder, salt, and milk. Once you have everything gathered together, you can start preheating your oven to 350 degrees Fahrenheit.
While the oven is preheating, it’s time to start preparing the batter. In a large bowl, cream together the sugar and butter until they’re light and fluffy. Then add in the eggs one at a time, mixing well after each addition.
Add in the vanilla extract and mix again. In another bowl (or a measuring cup), whisk together the dry ingredients: cake flour, baking powder, and salt. Slowly add this mixture into the wet ingredients while mixing on low speed until everything is well combined.
Finally stir in the milk until the batter is nice and smooth. Now it’s time to start assembling your cake! Take one of the prepared cake pans and line the bottom with parchment paper before adding 1/4 of batter into it – make sure to spread it out evenly so that your cake will bake evenly too!
Pop this pan into the oven and repeat with remaining batter until all four pans are filled and baking away. Assuming your oven bakes evenly (which most do), all four cakes should be done in about 25-30 minutes – just keep an eye on them so that they don’t overcook! Allow them to cool for a few minutes in their pans before inverting onto wire racks to cool completely before frosting or serving plain.
And there you have it: a delicious four-layer cake that’s perfect for any occasion!
How to Stack 3 Layer Cake
Whether you’re a beginner or a pro, here are some tips on how to stack a three layer cake. With a few simple tricks, your cake will be stable and look beautiful! Before you begin, make sure all of your cake layers are completely cooled.
If they’re even slightly warm, the layers will start to slide and it will be difficult to get them perfectly aligned. Once your cakes are cooled, level them off with a large serrated knife. This step is important because it will give you nice, flat surfaces to work with – no more wonky layers!
Now it’s time to start stacking. Place your first layer on a cake board or plate and spread some icing on top. Be generous with the icing – you want there to be enough so that the second layer can “stick” when you place it on top.
Gently set the second layer down and repeat the process of spreading icing. For the third and final layer, again spread plenty of icing before setting it in place atop the other two layers. Once all three layers are stacked, give the whole cake a crumb coat – this is a very thin layer of icing that helps trap any loose crumbs so they don’t end up marring your final frosting job.
Let the crumb coat set for about 15 minutes in the fridge before adding your final coating of frosting. And that’s it! You now have a beautifully stacked three layer cake ready to serve (and impress)!
How to Stack Cake Layers Straight
If you love baking cakes, then you know how important it is to have straight cake layers. This can be a challenge, especially if you are working with a large cake. But don’t worry, there are some easy tips that will help you get perfect results every time.
Here’s how to stack cake layers straight: 1. Make sure your cake layers are completely cooled before stacking them. If they’re even slightly warm, they’ll be more difficult to work with and more likely to slip out of place.
2. Use a serrated knife to level off the top of each cake layer. This will give you a flat surface to work with and make it easier to achieve straight sides. 3. Place your first cake layer on a cardboard round or plate.
Center it so that it’s evenly balanced. 4. Spread a thin layer of frosting over the top of the cake layer using an offset spatula . Be sure to go all the way to the edge so that the frosting acts as glue and helps hold everything in place.
5. Carefully place the second cake layer on top of the first one, lining up the edges as best as possible. Again, spread a thin layer of frosting over this second layer . 6 Repeat these steps until all your cake layers are stacked .
How to Stack a 2 Layer Cake
Baking a cake is always an exciting event, but when you’re baking a two layer cake, the anticipation is even greater. Here’s how to stack a two layer cake so that it looks as good as it tastes! 1. Start with a level surface.
Make sure your cake stands on a flat surface before you begin stacking. This will help ensure that your final product is level and there are no lopsided layers. 2. Place the first layer of cake upside down.
This may seem counterintuitive, but placing the first layer of cake upside down will actually help prevent it from sliding around or becoming misshapen when you add the second layer of cake on top. 3. Add frosting to the top of the first layer of cake. Now it’s time to start adding frosting!
Begin by spreading a generous amount of frosting over the top of the first (upside down) layer of cake. 4. Place the second layer of cake on top of the first one. Once you have a thick layer of frosting in between your two layers, it’s time to place the second layer on top of the first one right side up.
Gently press down on the secondlayer until it feels secure atopthefirstone 5- Finish Frosting and Decorating Your Cake The final step is to finish frosting and decorating your now stacked two-layer cake! Use whatever icing and decorations you like best – get creative!
Conclusion
This is a question that many cake makers struggle with. There are a few things to consider when trying to determine the perfect thickness for your cake layers. The first is the type of cake you are making.
A dense cake will require thicker layers than a light and fluffy cake. The second consideration is how many layers you want in your cake. A three-layer cake will need thinner layers than a six-layer cake.
Finally, you need to think about how you will be assembling your cake. If you plan on using dowels or pillars, then your layers can be thinner since they will have support from below. So, how thick should your cake layers be?
It depends on a few factors, but as a general rule, aim for somewhere between ½ inch and 1 inch thick. This way, you’ll have a delicious and beautiful cake that everyone will love!