Nothing beats the wonderful aroma of fresh baking in your kitchen. This chocolate cupcake recipe offers a rich experience that satisfies even the most demanding sweet tooth. You’ll get professional results using simple pantry staples and standard baking tools.
Preparing these homemade cupcakes needs quality cocoa and a reliable whisk. We’ll cover every detail, from mixing the batter perfectly to achieving an airy topping. These treats have a velvety texture that melts on your tongue instantly.
Every baker needs specific equipment like a muffin tin, paper liners, and measuring spoons for consistent success. This guide makes the entire method simple, so anyone can bake like a master. You’ll learn exactly which essential ingredients and parts are needed for this dessert.
Get ready for a light, whipped finish that balances the deep cocoa flavors. This detailed journey gives you every part needed for a successful and tasty baking time. Enjoying the baking process is just as important as the first bite.
Why This Chocolate Cupcake Recipe Stands Out
This chocolate cupcake recipe is special because it uses top-notch ingredients and a unique frosting method. It’s all about giving you a rich, chocolate dessert that’s both indulgent and elegant.
The recipe calls for premium cocoa powder and dark chocolate for a deep, fulfilling taste. Adding freshly brewed coffee boosts the chocolate flavor without making it taste like coffee. This adds a layer of complexity to the cupcakes.
The chocolate mousse frosting is a highlight of this recipe. It’s unlike regular buttercream, being light and fluffy. This frosting is made by melting chocolate and whipping heavy cream until it’s soft. Then, they’re gently mixed together.
Here are some key reasons why this recipe is worth trying:
- High-quality ingredients for a rich flavor profile
- Unique chocolate mousse frosting technique
- Moist and decadent cupcakes
- A perfect balance of flavors
This baking guide will guide you through making these amazing chocolate cupcakes. It’s designed for both new and experienced bakers. You’ll learn how to make cupcakes that look and taste like they were made by a pro.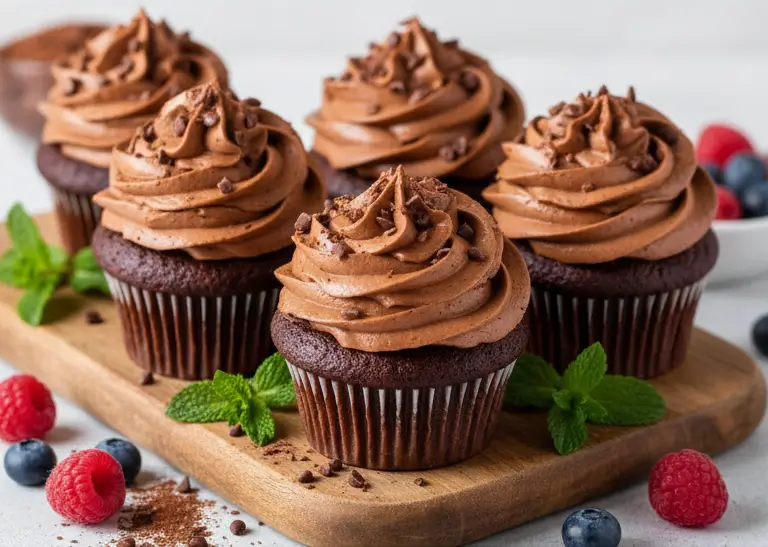
Essential Ingredients for Chocolate Cupcakes
The key to a tasty chocolate cupcake recipe is in the ingredients. Each part plays a role in the taste and texture. It’s important to know how they work together.
Dry Ingredients You’ll Need
Dry ingredients give your cupcakes structure and texture. Here’s what you need:
- All-purpose flour
- Granulated sugar
- Cocoa powder
- Baking powder
- Salt
Wet Ingredients for Moisture and Flavor
Wet ingredients add moisture and flavor. The main ones are:
- Large eggs
- Whole milk
- Vegetable oil
- Vanilla extract
Ingredient Quality Tips and Substitutions
High-quality ingredients are crucial for great taste and texture in your chocolate cupcake recipe. Here are some tips:
- Choose high-quality cocoa powder for a deeper chocolate flavor.
- Use room temperature eggs for better emulsification.
- Consider substituting whole milk with almond milk for a dairy-free version.
- For a gluten-free version, substitute all-purpose flour with a gluten-free flour blend.
By focusing on ingredient quality and making smart substitutions, you can make a chocolate cupcake recipe that fits your needs and tastes.
Ingredients for Chocolate Mousse Frosting
The secret to a decadent chocolate mousse frosting is in its ingredients. You need the best parts to make it rich and light.
Core Frosting Components
A great chocolate mousse frosting starts with a few key ingredients. These are:
- High-quality dark or semi-sweet chocolate
- Heavy cream
- Granulated sugar
- Unsalted butter
High-quality chocolate is key for flavor and texture. Heavy cream makes it light and airy. Granulated sugar adds sweetness, and unsalted butter enhances flavor and texture.
Optional Flavor Enhancers and Toppings
To elevate your chocolate mousse frosting, try adding optional ingredients. These can be:
- Espresso powder for a deeper chocolate taste
- Vanilla extract for more depth
- Chopped nuts or chocolate shavings for garnish
- Cocoa powder for an extra chocolatey boost
These extras let you tailor the frosting to your liking. You can add a mocha twist with espresso or a simple touch with chocolate shavings. The choices are endless.
Kitchen Tools and Equipment Needed
Before you start baking homemade chocolate cupcakes with chocolate mousse frosting, you need to gather the right tools and equipment.
Baking Essentials
You’ll first need some basic baking tools. These include:
- Cupcake Pan: A standard 12-cup muffin tin to hold your cupcake liners.
- Cupcake Liners: Paper liners to make cupcakes easy to remove and serve.
- Oven Thermometer: Ensures your oven is at the correct temperature.
Mixing and Preparation Tools
For mixing and preparing the batter and frosting, you’ll need:
- Mixing Bowls: Stainless steel or glass bowls for mixing ingredients.
- Electric Mixer: A stand or handheld mixer for creaming butter and sugar, and whipping cream.
- Whisk and Spatula: For mixing and folding ingredients together.
Decorating and Finishing Supplies
For decorating your cupcakes, consider the following:
- Piping Bag and Tips: For piping the chocolate mousse frosting onto cupcakes.
- Offset Spatula: Useful for smoothing frosting and creating decorative edges.
- Chocolate Shavings or Sprinkles: Optional toppings for added decoration.
Having these tools and equipment ready will make baking and decorating your chocolate cupcakes with chocolate mousse frosting easy. Follow this baking guide for a fun cupcake decorating experience.
How to Make Chocolate Cupcakes With Chocolate Mousse Frosting: Preparing the Batter
The foundation of a great chocolate cupcake recipe starts with the batter. To get the right mix of flavors and texture, follow these steps carefully.
Step 1: Preheat Oven and Prepare Cupcake Pan
First, preheat your oven to the temperature in your recipe. It’s usually around 350°F (175°C) for regular-sized cupcakes. While the oven warms up, get your cupcake pan ready with liners. This makes sure your cupcakes come out easily.
Step 2: Sift and Combine Dry Ingredients
In a medium bowl, sift dry ingredients like flour, sugar, cocoa powder, and baking powder. Sifting gets rid of lumps and adds air for lighter cupcakes. For the best taste, use top-notch cocoa powder for a deep chocolate flavor.
- 1 1/2 cups all-purpose flour
- 1 cup granulated sugar
- 1/2 cup unsweetened cocoa powder
- 2 teaspoons baking powder
Step 3: Whisk Together Wet Ingredients
In a big bowl, whisk together wet ingredients like eggs, milk, and oil. Make sure your eggs are room temperature for a smoother batter.
- Crack 2 large eggs into the bowl.
- Add 1/2 cup of milk and 1/4 cup of vegetable oil.
- Whisk until it’s smooth and well mixed.
Step 4: Mix and Create Smooth Batter
Slowly add the dry ingredients to the wet ingredients, mixing until just combined. Don’t overmix to avoid dense cupcakes. The batter should be smooth and lump-free.
By following these steps, you’ll make a tasty batter for your homemade cupcakes. Remember to mix gently and avoid overmixing. This way, your cupcakes will be light and fluffy.
Baking Your Chocolate Cupcakes to Perfection
Getting your chocolate cupcakes just right takes some know-how. You need to know how to fill liners, the right baking time, and cooling methods. A detailed baking guide is key to success.
Filling Cupcake Liners Correctly
Filling liners right is the first step. Fill them about 2/3 full to help them rise evenly. Using an ice cream scoop helps portion the batter evenly.
Optimal Baking Time and Temperature
The right baking time and temperature are essential. Most recipes call for 350°F (175°C) for 18-20 minutes. But, this can change based on your oven and recipe. Check the cupcakes a minute or two early to avoid overcooking.
Testing for Doneness
Testing for doneness is crucial. Stick a toothpick into the center of a cupcake. If it’s clean or has a few moist crumbs, they’re done. This ensures the right texture and prevents overcooking.
Cooling Process and Timing
Cooling is a key step that should not be rushed. Let them cool in the pan for a few minutes. Then, move them to a wire rack to cool completely. This stops the cooking and keeps them moist.
By following these steps and tips, your homemade cupcakes will always be perfectly baked.
Creating the Chocolate Mousse Frosting
Creating a chocolate mousse frosting is easy. It’s a key part in making your cupcakes look and taste amazing. It’s especially important for cupcake decorating.
To make it, melt chocolate, whip heavy cream, and then mix them together gently. This makes a frosting that’s light, airy, and full of flavor. It pairs perfectly with the moist chocolate cupcakes.
Step 1: Melt the Chocolate Properly
Start by melting high-quality dark or semi-sweet chocolate. Use a double boiler or a heatproof bowl over simmering water. This method keeps the chocolate smooth and prevents it from becoming grainy.
Stir the chocolate now and then as it melts. Make sure it’s smooth and shiny. Avoid letting water touch the chocolate, as it can ruin it.
Step 2: Whip Heavy Cream to Soft Peaks
Whip heavy cream in a separate bowl until it thickens. Keep whipping until it forms soft peaks. Don’t overdo it, or it will turn into butter. It should still be smooth but hold its shape a bit.
Step 3: Fold Chocolate and Cream Together
When the chocolate has cooled a bit but is still runny, mix it with the whipped cream. Use a spatula to gently fold them together from the top down. This keeps the cream light and airy.
Keep folding until the chocolate is fully incorporated and the mixture is even. This step needs patience to keep the frosting light.
Step 4: Chill Until Frosting Reaches Perfect Consistency
Put the frosting in a bowl and chill it for at least 30 minutes. This makes it firmer and easier to use for decorating.
The frosting should be pipable but hold its shape well. If it’s too stiff, let it sit at room temperature for a few minutes to soften.
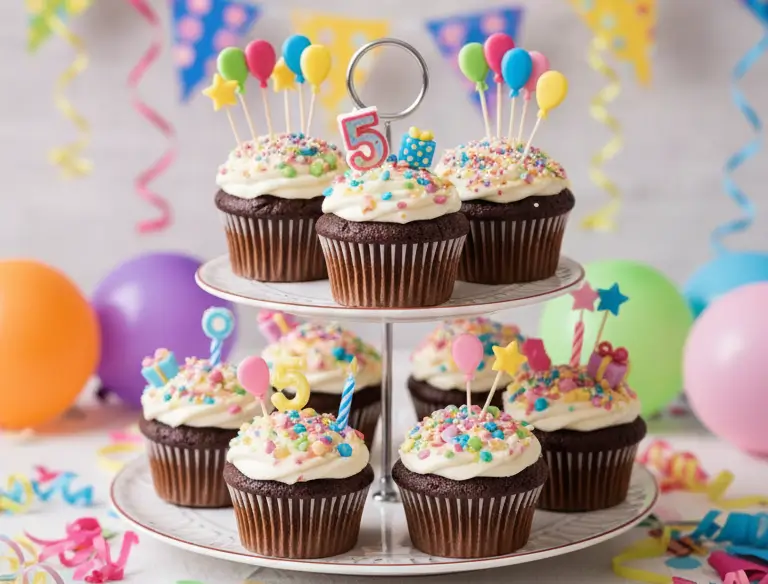
Assembling and Decorating Your Cupcakes
Now that your cupcakes are baked and frosting is ready, it’s time to decorate. This is where you can show off your creativity. You’ll turn your cupcakes into a stunning chocolate dessert that will wow everyone.
Preparing Cupcakes for Frosting
First, make sure your cupcakes are cool. This is key to prevent the frosting from melting. If you cooled them as suggested, they’re ready for frosting. Place them on a stable surface for easy frosting.
Piping Techniques for Beautiful Results
Piping takes practice, but with these tips, you’ll get the hang of it. Start by choosing the right piping tip. A star tip works best for a pretty swirl. Hold the bag at a 90-degree angle and pipe in a circle, starting outside and moving in.
- Use a turntable to easily access all sides of the cupcake.
- Apply consistent pressure for an even swirl.
- Practice on parchment paper before frosting your cupcakes.
Adding Garnishes and Final Decorative Touches
The final touches can make your cupcakes stand out. Try adding chocolate shavings, edible gold dust, or fresh berries for a professional look. Keep it simple or get creative, depending on your theme.
By following these steps, you’ll have not just tasty chocolate cupcakes. You’ll also have a beautiful chocolate dessert perfect for any celebration.
Storage Tips and Serving Suggestions
Keeping your homemade chocolate cupcakes fresh is key. Whether for a special event or a sweet treat, knowing how to store them is crucial. It ensures they taste great and stay moist.
Storing Cupcakes Correctly
Store cupcakes in an airtight container to keep them fresh. This stops moisture from ruining the frosting and cake. If it’s humid, refrigerate them but let them warm up before eating.
At room temperature, cupcakes stay fresh for 2 days. But if you won’t eat them in 2 days, refrigerate them. Keep them in an airtight container to avoid odors.
Shelf Life and Freshness Guidelines
The storage method affects how long your homemade cupcakes last. At room temperature, they’re good for 2 days. In the fridge, they can last up to 5 days. The frosting might get firmer in the fridge, so let them sit at room temperature for 30 minutes before serving.
- Room temperature: Up to 2 days
- Refrigerated: Up to 5 days
- Freezer (without frosting): Up to 2 months
Best Practices for Serving
When serving your cupcakes, make sure they’re at room temperature. This lets the flavors come alive. Add a touch of elegance with chocolate shavings, whipped cream, or edible flowers.
For a fancy presentation, serve on a decorative stand or platter. It shows off your baking skills and makes the dessert more appealing.
Conclusion
Learning to bake homemade chocolate cupcakes with chocolate mousse frosting is very rewarding. This guide shows you how to make a delicious dessert for any event. The chocolate cupcake recipe makes moist and tasty treats. The chocolate mousse frosting adds a light and airy touch.
To get the best results, use top-quality ingredients and follow the tips for making the batter, baking, and putting the cupcakes together. With practice, you’ll get better at making these delicious chocolate cupcakes. You’ll impress your friends and family with your baking skills.
If you love baking or are just starting, this chocolate cupcake recipe with chocolate mousse frosting is a must-try. So, start baking and enjoy the rich flavors of your freshly baked treats.
FAQ
What is the secret to getting a deep chocolate flavor in these cupcakes?
For a deep chocolate taste, use bloomed cocoa powder. Mix Dutch-process cocoa with boiling water or Starbucks espresso. This releases the chocolate’s full flavor. Adding Nielsen-Massey vanilla extract also boosts the sweetness and complexity.
Which type of chocolate is best for the chocolate mousse frosting?
Choose high-quality baking bars for a smooth mousse. Ghirardelli 60% Cacao or Baker’s Semi-Sweet bars work well. They melt smoothly, giving your frosting a luxurious feel.
Can I substitute the dairy in this recipe for a vegan alternative?
Yes, you can make vegan versions. Use Silk Almond Milk with lemon juice for buttermilk. Replace eggs with Bob’s Red Mill Egg Replacer. For frosting, whip Thai Kitchen Coconut Milk’s fatty cream part as a heavy cream substitute.
How do I prevent my chocolate cupcakes from sinking in the middle?
Sinking happens from over-leavening or opening the oven too soon. Use fresh Arm & Hammer Baking Soda and a Taylor Precision Products oven thermometer. Avoid overbeating the batter with King Arthur All-Purpose Flour.
What piping tip should I use to get the classic bakery swirl?
Use a Wilton 1M or 2D tip for a professional look. Start in the center and spiral outward. The light frosting holds these shapes well if kept cool.
How should I store the cupcakes to keep the mousse frosting from melting?
Store them in an airtight container in the fridge. They last up to three days. Take them out 15 to 20 minutes before serving for the best taste.
Can I make the chocolate mousse frosting ahead of time?
Prepare the mousse up to 24 hours in advance. Store it covered with Glad Press’n Seal. Before piping, gently whisk it with a KitchenAid hand mixer to restore its airiness.